AI Embroidery Digitizing Software for Logos and Complex Designs
Introduction: Why Your Embroidery Needs a Brain Upgrade
Let’s be real. You have tried manual digitizing. It takes forever. You stare at a logo with tiny text, gradients, and overlapping colors, and your brain hurts just thinking about the stitch paths. That is where AI embroidery digitizing software steps in. It does not just guess. It learns, adapts, and spits out production-ready files that actually make your machine sing. I remember my first disaster with a complex corporate logo. The letters merged into a blob. The curves looked like a zigzag mess. I swore off embroidery for a week. Then I found AI-driven tools, and everything changed. Today, I want to show you how you can take even the wildest vector art and Convert AI File to Embroidery Format without losing your mind—or your weekend.
We will cover what makes AI digitizing different, which software actually works, and how to avoid the rookie mistakes that turn a beautiful logo into a tangled nest of thread.
What Exactly is AI Embroidery Digitizing Software?
Think of traditional digitizing like tracing a drawing by hand. You pick every stitch direction, density, and underlay. It works, but it is slow and depends heavily on your skill level. AI embroidery digitizing software flips the script. It analyzes your artwork, recognizes shapes, textures, and even color transitions, then automatically maps out the most efficient stitch path.
The software learns from thousands of previous designs. It knows that a sharp corner needs a different approach than a smooth curve. It spots small text and adjusts pull compensation before you even hit export. You still have control, but the heavy lifting happens in seconds, not hours.
For logos and complex designs, this is a lifesaver. Logos often have multiple gradients, tiny details, and specific brand colors. A human digitizer might take three hours on a tricky crest. AI does it in five minutes, and you can tweak the results live.
Convert AI File to Embroidery Format – The First Step You Cannot Skip
Here is the golden rule. You must Convert AI File to Embroidery Format before you even think about hooping fabric. Why? Because Adobe Illustrator files (AI) store vector data, not stitch data. Vectors are math. Embroidery files are thread paths. They speak different languages.
AI embroidery software acts as your translator. You drop your AI file into the program. It reads every vector point, every fill color, every stroke. Then it rebuilds that visual information into stitches. For example, a solid red circle in Illustrator becomes a satin or tatami fill in embroidery. The software decides the angle, density, and direction so the thread lays flat and shiny.
Do not try to cheat by converting to a JPEG or PNG first. You lose vector sharpness. AI files keep the edges crisp, which means your final stitches look professional. So remember: open your AI file inside your digitizing software, not on your phone or basic photo editor.
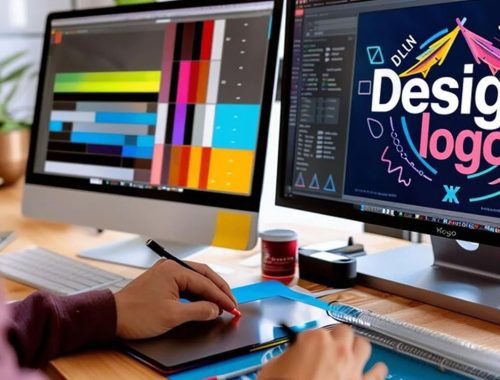
Best AI-Powered Tools for Logos and Complex Designs
Let me break down three solid options that actually deliver. I have used all of them, and each shines for different reasons.
1. Wilcom EmbroideryStudio e4.5 with AI Auto-Digitizing
Wilcom is the gold standard. Their AI does not just trace—it interprets. You feed it a complex logo with bevels and drop shadows, and it suggests stitch types, underlays, and pull comp. The learning curve exists, but once you master it, you fly through designs. Their Edge Run technology makes curves smooth as butter.2. Hatch Embroidery Digitizer
Hatch uses the same engine as Wilcom but with a friendlier face. Perfect for small business owners who digitize their own hats and jackets. The AI auto-digitizing handles up to 15 colors without freaking out. I love their “PhotoStitch” for turning raster logos into clean vectors first, then into embroidery.3. Embrilliance StitchArtist Level 3
Embrilliance takes a hybrid approach. You manually guide the AI, which gives you more control over complex designs. Their path tools let you set stitch angles on overlapping elements, so letters do not disappear into backgrounds. It runs on Mac and Windows, which is rare.All three let you Convert AI File to Embroidery Format natively. No extra plugins. Just drag, drop, and adjust.
How AI Handles Complex Design Elements Like a Pro
Let us talk about the scary stuff. Gradients. Small serif fonts. Thin lines. Overlapping colors. These elements destroy manual digitizing. But AI eats them for breakfast.
Take a gradient logo. In traditional digitizing, you would use multiple fill blocks with different colors and try to blend them. That takes forever and often looks banded. AI embroidery software analyzes the gradient map and creates a tatami fill with varying densities. It fakes the gradient effect using thread color changes and stitch angles. You get a smooth transition that tricks the eye.
For tiny text, AI measures the letter height against your fabric type. If the font is under 4mm, it switches to a monochrome or simple run stitch instead of a satin. That keeps the letters readable. No more blobby “e” or “a” shapes.
Thin lines? AI uses bean stitches or triple runs to add bulk without widening the line. It recognizes that a 0.5pt stroke in your AI file needs three passes of thread to stand out on a polo shirt.
Overlapping colors get automatic underlays. The software knows that a red shape under a blue shape needs a light underlay to stop the blue from sinking into the red. You do not have to think about pull comp or push-pull. The AI calculates it based on fabric type and stitch direction.
Step-by-Step: From AI File to Finished Embroidery
I want you to see exactly how this works in real life. Grab your AI logo and follow along.
Step 1: Prep your AI file. Remove any live paint, weird transparency effects, or clipping masks. Convert all text to outlines. Flatten layers into simple shapes. The cleaner the vector, the better the AI digitizing.
Step 2: Open your AI embroidery software. Import the AI file directly. Do not convert to another format first.
Step 3: Let the AI auto-digitize. Click the auto-digitize button. Watch the software map stitch types, angles, and underlays. This takes 10 to 30 seconds for a complex design.
Step 4: Review and tweak. Zoom in on small text. Check satin edges for gaps. Adjust stitch density if you see too many thread breaks. The AI gets you 90% there. You handle the final 10%.
Step 5: Simulate the sew-out. Most AI software includes a 3D viewer. Watch the needle path. Look for trims, jumps, and color changes. Optimize the sequence so your machine does not waste time.
Step 6: Export your embroidery file. Choose your machine format. .DST for Tajima, .PES for Brother, .EXP for Melco. Then hoop up some scrap fabric and test.
That last test matters. Even the best AI cannot guess your specific fabric tension or backing. Run a sample, tweak the pull comp, and save your final version.
Common Mistakes and How AI Fixes Them
You might think AI makes you invincible. It does not. But it does eliminate the biggest human errors.
Mistake one: Ignoring push-pull compensation. When a satin stitch pulls fabric inward, the design shrinks. AI automatically adds pull comp based on stitch length and fabric type. You do not have to guess.
Mistake two: Wrong stitch angles. A human might run all fills at 45 degrees. That works for simple shapes. But complex logos need variable angles to reduce bulk. AI rotates fill angles automatically so you do not get thick, stiff patches.
Mistake three: Too many color changes. Human digitizers often break a design into unnecessary color segments. AI analyzes continuous tones and groups them efficiently. You cut down on trims and thread changes by 30% or more.
Mistake four: Bad underlay for caps. Caps need heavy underlays to stop sinking. AI recognizes when you select a cap frame profile and doubles the underlay density. You get crisp logos on curved surfaces.
Conclusion: Stop Fighting Your Embroidery Machine
AI embroidery digitizing software is not science fiction. It works right now, and it works well for logos and complex designs. You save hours of manual tracing. You eliminate frustrating sew-outs that look nothing like the original art. And you finally get to Convert AI File to Embroidery Format without needing a degree in computer science.
My advice? Download a free trial of Hatch or Wilcom this week. Throw your hardest logo at it. Let the AI do its thing. Then sew it out on an old t-shirt. I promise you will smile when you see those crisp satin edges and readable small text.
The future of embroidery is not just automatic. It is intelligent. And it is waiting for you to stop suffering through manual digitizing. Go try it. Your machine will thank you.