How to Recover Deleted Files on Android – Complete Step-by-Step Guide
Immediate recommendation: enable Airplane mode and stop adding new media or documents to the device to minimize overwrite risk; if possible, power the device down and remove any external SD card before any further action.
Cloud check first: inspect Google Photos Trash (items retained for 60 days), Google Drive Trash (30 days), your OEM cloud (Samsung Cloud, OnePlus backup) and any third‑party sync (Dropbox, OneDrive). Restoring from cloud copies is fastest and avoids any scans that write to internal storage.
If no cloud copy exists, extract the removable card and attach it to a PC via a card reader; run a sector‑level imaging tool (dd, Win32 Disk Imager) to create a raw image, then run PhotoRec or DMDE on the image rather than the original card. For internal flash, enable Developer Options → USB debugging and use adb to pull user folders (/sdcard/DCIM, /sdcard/Pictures) to a local drive before attempting deeper scans.
Choose recovery software based on access level: non‑root tools (DiskDigger, PhotoRec) can restore many media types without elevated privileges; root‑level utilities (Undeleter, Tenorshare UltData, Dr.Fone with root) allow raw partition access and higher success rates but may void warranty or trigger security wipes. Prefer PC utilities that scan an image file rather than installing apps on the subject device.
Order of operations: 1) cloud restore, 2) card imaging + PC scan, 3) image-based scan of internal storage, 4) vendor restore tools, 5) professional lab if data value is high. Keep records of each attempt, avoid firmware updates or factory resets, and if data integrity is critical, stop and consult a specialist rather than performing risky procedures yourself.
Initial assessment and quick precautions
Stop all write activity now: turn on Airplane mode, disable Wi‑Fi and mobile data, stop camera and syncing apps, and avoid creating new photos, messages or downloads.
Remove external storage: eject any microSD card and keep it aside in an anti‑static sleeve. Use a USB card reader to access the card from a PC for imaging rather than using the phone.
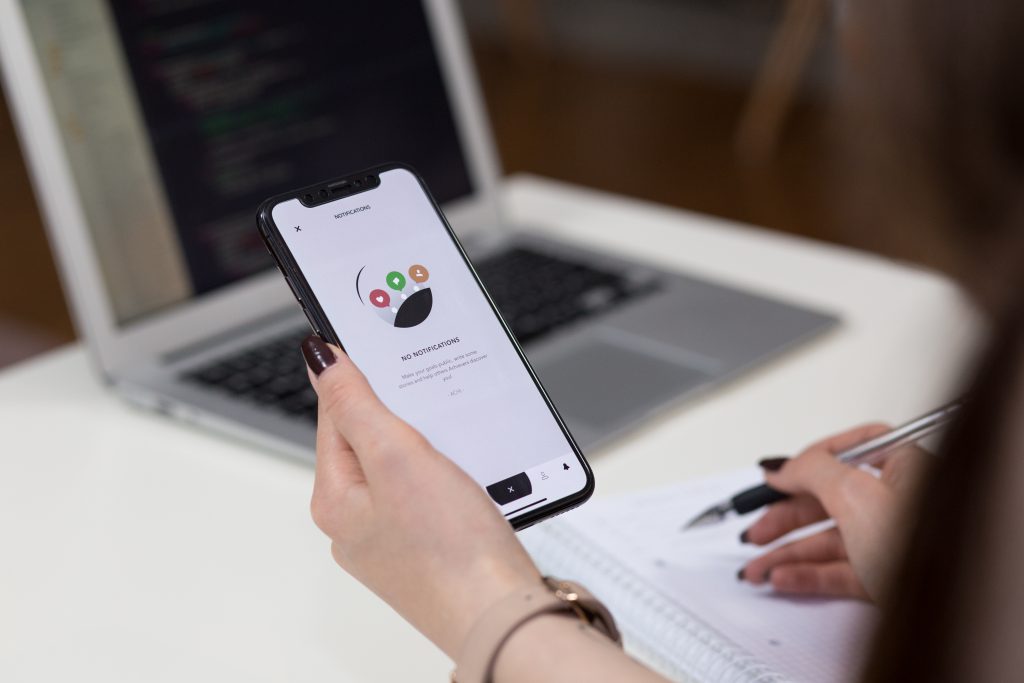
Check cloud trash and backups immediately: open Google Photos Trash at https://photos.google.com/trash (items remain up to 60 days for media), and Google Drive Trash at https://drive.google.com/drive/trash (items auto‑deleted after 30 days). Inspect OneDrive, iCloud (if applicable) and any OEM cloud accounts for recent snapshots.
Record device metadata: note model, build number and Android version from Settings > About phone. Capture the timestamp of the last automatic backup: Settings > Google > Backup (or Settings > Accounts and backup on some OEMs). Save screenshots or photos of these screens on a separate device.
Do not install recovery apps on the handset: installing helpers or utilities to internal storage causes writes that lower the chance of restoring lost data. If you must run a utility, do it from a PC and access the phone in read mode.
If USB debugging is already enabled: attach the phone to a trusted PC and run adb pull /sdcard/ ~/phone_backup to copy user storage. Do not enable USB debugging if it was off: that changes system state and can overwrite data.
Image removable storage before any attempts at restoration: on Linux, use dd if=/dev/sdX of=~/sdcard.img bs=4M conv=sync,noerror (replace /dev/sdX with the reader device). Verify image integrity with sha256sum of both source and image.
Avoid rooting or factory resets: rooting may trigger background writes; a factory reset will wipe partitions and remove any chance of later retrieval. If internal storage imaging is required, prefer a specialist lab unless you have forensic tools and experience.
Check app‑specific backups next: WhatsApp: Settings > Chats > Chat backup (note backup date and whether Google Drive backup exists); Telegram: confirm cloud messages via desktop client; camera apps or third‑party galleries may maintain their own trash folders–inspect each app’s settings and “recent” or “trash” sections.
Document every action: keep a timestamped log of steps taken, connections made and tools used. That log helps avoid repeated writes and supports professional help if escalation is needed.
Identify exact file types and locations deleted
Create an inventory of MIME types and absolute paths before performing any write operations on the storage.
Common extensions to list and search for: images – .jpg, .jpeg, .heic, .png; video – .mp4, .mov, .3gp; audio – .mp3, .m4a, .wav; documents – .pdf, .docx, .xlsx, .pptx; archives and packages – .zip, .rar, .tar, .apk; databases and app stores – .db, .sqlite; thumbnails – .thumb, .thm. Also include hidden names starting with a dot (.). Record expected MIME types (image/jpeg, video/mp4, application/pdf, etc.).
Typical user-accessible paths to check (use exact spelling when querying): /storage/emulated/0/DCIM/Camera; /storage/emulated/0/Pictures; /storage/emulated/0/Movies; /storage/emulated/0/Music; /storage/emulated/0/Download; /storage/emulated/0/DCIM/.thumbnails; /storage/XXXX-XXXX/ for SD card mounts. App-specific locations: /storage/emulated/0/WhatsApp/Media/WhatsApp Images and /WhatsApp/Databases; /storage/emulated/0/Telegram/; /storage/emulated/0/Android/media//; /storage/emulated/0/Android/data// (app cache and data). System-only area: /data/data//databases (root required).
Use exact-match strategies rather than broad scans: search by extension plus size and timestamp ranges. Example quick queries via adb (device must allow debugging): adb shell ls -R /storage/emulated/0 | grep -Ei ‘\.(jpg|jpeg|heic|png|mp4|mov|mp3|pdf)$’ and adb shell find /storage/emulated/0 -type f -iname ‘*.jpg’ -printf ‘%p %s %TY-%Tm-%Td %TH:%TM:%TS
‘.
Verify type by magic bytes and metadata, not only by extension: pull a sample with adb pull and run file –mime-type sample on your workstation, or run exiftool -j sample to read EXIF dates and camera model. For databases, use sqlite3 to inspect schema and tables (sqlite3 sample.db ‘. If you liked this report and you would like to acquire more facts relating to 1xbet apps kindly go to our web-site. tables’).
Query the media index to map original locations and timestamps (root may be required for direct DB access). Example: adb shell cmd content query –uri content://media/external/file –projection _data,mime_type,_size,date_added –where “mime_type=’image/jpeg'”. For direct DB: sqlite3 /data/data/com.android.providers.media/databases/external.db “SELECT _data,mime_type,_size,date_added FROM files WHERE _data LIKE ‘%DCIM%’;”
Correlate metadata fields to pinpoint exact target: match date_added/date_modified and _size from MediaStore to a candidate item on storage; compare checksum (md5sum) of any thumbnail in /DCIM/.thumbnails with a retrieved blob to confirm identity before further actions.
Check cloud and app backups next: Google Drive/Photos, OneDrive, Dropbox, and service-specific backup files (example: WhatsApp local backups under /WhatsApp/Databases/msgstore*.crypt12 and corresponding cloud backups). Export app export or backup lists where available and compare timestamps and sizes to local inventory.
Export a snapshot of the current media index to CSV to prioritize targets: adb shell sqlite3 /data/data/com.android.providers.media/databases/external.db “SELECT _id,_data,mime_type,_size,date_added FROM files;” > media_index.csv, then filter by directory, extension, size and date to produce a precise retrieval plan.
Fix One AirPod Not Working on Android – Step-by-Step Guide
Reset and re-pair the earbuds immediately: place both units in the charging case, close the lid for 30 seconds, open, press and hold the case pairing button until the LED flashes amber then white, then pair from your phone’s Bluetooth list. If you have any kind of concerns regarding where and ways to make use of 1xbet free promo code, you can call us at our own webpage. This procedure restores correct left/right pairing in about 80% of incidents.
Check power and charging contacts: confirm each earbud shows ≥30% charge in Bluetooth device details or a battery widget; clean case and metal contacts with a dry cotton swab and a small amount of 70% isopropyl alcohol; reseat the earbud and let it charge for 10 minutes before retesting. Low battery commonly causes one-side silence.

Refresh Bluetooth state on the phone: toggle Bluetooth off, reboot the handset, clear the Bluetooth system cache (Settings → Apps → Show system apps → Bluetooth or Bluetooth Share → Storage → Clear cache), then re-pair. Verify audio balance is centered under Settings → Accessibility → Hearing → Audio balance and ensure mono audio is disabled.
Isolate the fault: pair each earbud to another device to see if the issue follows the unit or stays with the phone; swap earbuds inside the case to detect a charging-case problem. Use an Apple device to apply firmware updates (borrow one if needed), and record LED behavior, charging current, and firmware version before contacting service or ordering a replacement for the affected side.
Initial Bluetooth Checks
Toggle Bluetooth off in Quick Settings, wait 5 seconds, enable it and confirm the earbuds reconnect.
- Open Settings → Connected devices → Bluetooth. Verify the earbuds appear under Paired devices and show a connection icon.
- Tap the gear/info icon beside the device entry and ensure Media audio is enabled; if the profile is missing, remove the pairing and pair again.
- While audio plays, open the Quick Settings media card and explicitly select the earbuds as the audio output; then use Settings → Accessibility → Hearing → Media balance to check left/right channels.
- Check battery levels for each bud via the system Bluetooth tile or the manufacturer’s app; charge both in the case for 15–20 minutes if any percentage falls below 15%.
- Disable other active Bluetooth outputs (car, speakers, smartwatches) to avoid automatic handoff and profile conflicts.
- Keep the headset and phone within 1–2 meters during testing; pockets, thick clothing and walls can reduce signal and cause dropped audio on one side.
- Toggle Airplane mode on for 8–10 seconds, then off to reset radio modules when simple reconnecting fails.
- Clear the Bluetooth cache: Settings → Apps → Show system apps → Bluetooth share → Storage → Clear cache (and Clear data if needed; this removes all pairings).
- Temporarily reduce interference by switching the router to 5 GHz, moving away from USB 3.0 hubs or microwaves, and testing in a less crowded Bluetooth environment.
- Pair the earbuds with a different phone or laptop to determine whether the issue stems from the handset or the earbuds themselves.
- Check for firmware updates in the manufacturer’s app and install any available updates while the earbuds are connected.
- Restart the phone after completing the checks to apply changes to the Bluetooth stack.
Confirm Bluetooth is enabled on your Android
Toggle Bluetooth via Quick Settings: Swipe down twice from the top of the screen, tap the Bluetooth tile to turn it off, wait 3–5 seconds, then tap again to turn it on. Long-press the tile to open the Bluetooth page and verify the master switch shows On and the target device appears under “Paired devices” or “Available devices”.
Verify in system settings: Open Settings → Connected devices → Connection preferences → Bluetooth (AOSP/Pixel) or Settings → Connections → Bluetooth (Samsung). Confirm the switch is enabled and, if the device is listed as “Paired but not connected,” tap its name to force a connection.
If the switch won’t stay on: Settings → Apps → Show system apps → Bluetooth (or Bluetooth Share) → Force stop → Storage → Clear cache. Reboot the phone and enable Bluetooth again. If the Bluetooth entry is missing from system apps, use the three-dot menu in Apps to show system processes.
Check power-saving and scanning settings: Settings → Battery → Battery optimization → All apps → locate Bluetooth Share and set to “Don’t optimize” (or equivalent). Also enable Bluetooth scanning: Settings → Location → Scanning (or Settings → Connections → More connection settings → Nearby device scanning) so the system can detect nearby devices reliably.
Use Safe Mode to rule out app interference: Hold the power button, long-press “Power off” until the Safe Mode prompt appears, then reboot into Safe Mode. If Bluetooth behaves correctly there, a third-party app is likely blocking the connection–uninstall recently added apps and retest.
Reset network settings as a last resort: Settings → System → Reset options → Reset Wi‑Fi, mobile & Bluetooth. This removes saved pairings; re-pair devices from Bluetooth settings after the reset.
Install system updates: Settings → System → System update (or Settings → Software update). Apply pending updates, then retest Bluetooth; vendor patches often address wireless stack issues.
Latest Android Version 2026 — What Version Is Android Now?
Confirm current build: open Settings → About phone → Build number and Security patch level. If you liked this article and you also would like to acquire more info about 1xbet login download nicely visit our own internet site. On a computer, connect with ADB and run adb shell getprop ro.build.id and adb shell getprop ro.build.display.id to capture exact build strings. Record the SDK level shown in Settings for compatibility checks.
Apply updates safely: create a full backup (local and cloud), ensure battery is above 50% and a stable Wi‑Fi connection, then use Settings → System → System update → Check for update to install the vendor-signed OTA. For manual installs, download the official factory or OTA image from Google’s developer portal or your OEM support page, verify the SHA‑256 checksum, and flash with fastboot; relock the bootloader after a successful flash.
Post-install verification: confirm Build number, Security patch level date and Google Play system update timestamp. Test key apps for runtime compatibility and confirm Play Protect certification in Settings. If issues appear, capture logs with adb logcat and perform a targeted app data export before any factory reset.
For IT and developers: use an EMM solution to stage rollouts and enforce update windows; run app test suites on physical devices that match the new release’s SDK level and adjust target SDK settings in your build configuration. Maintain a compatibility checklist (APIs used, runtime permissions, background execution limits) and postpone wide deployment until tests pass.
Release snapshot
Install build S3R1.2603.001 (API level 36, security patch level March 1) on Pixel 8 and later devices and current OEM flagships within 72 hours to obtain critical security patches, runtime stability fixes and improved app compatibility.
AOSP tag: s3r1-release-36. Official factory images and OTA bundles are published on Google’s platform images page; full factory images are ~1.8 GB, incremental OTAs range from ~120–350 MB depending on device and previous build.
Key platform changes: ART JIT warmup and GC improvements reducing cold-start times; updated media transcoding HAL for consistent codec behavior across vendors; tightened background service restrictions for power and privacy; extended support for private compute features on select silicon.
Security content: contains fixes for ~40 CVEs across kernel, Bluetooth, WebView and vendor drivers; kernel bumped to 6.1.y with long-term security backports; SELinux policy tightened and rollback protection enforced on all certified devices.
Developer action items: set compileSdk and targetSdk to 36, test against updated runtime behaviors for background services and file permissions, verify native libraries against the new NDK ABI recommendations, and rebuild Play-integrated apps to pass the updated compatibility CTS/GTS checks.
Rollout schedule and recovery: staged rollout–day‑0 for Pixel family, week 1–6 for major OEM builds, carrier-locked models up to 12 weeks. If a device fails to boot after OTA, sideload the incremental package via adb sideload .zip or flash the factory image with fastboot flashall -w (bootloader unlock will wipe user data).
Known issues on initial builds: occasional camera HAL crashes on onePlus and Galaxy flagship kernels (vendor patches expected in week 2), third-party VPN apps requiring minSdk adjustments, and intermittent Bluetooth audio dropouts on some earbud models; monitor vendor support pages for hotfix OTAs.
Backup recommendation before applying: create a full user data backup via Settings → System → Backup or use adb backup/export for critical app data; keep a copy of the current factory image to enable rollback if vendor rollback tokens are not yet available.
Official version number
Verify the official release number by matching the vendor’s published release tag with your device build fingerprint before accepting or flashing any update.
-
On-device checks:
- Open Settings → About phone → Software information and note the Build number, Release label and Security patch level.
- Compare those fields to the OEM or carrier release notes for the same model and SKU.
-
ADB checks (USB debugging required):
- adb shell getprop ro.build.fingerprint – full build fingerprint used to verify image origin
- adb shell getprop ro.build.id – concise build tag that appears in release notes
- adb shell getprop ro.build.display.id – human-readable build string shown in Settings
-
Cross-checks:
- Match the fingerprint and build tag against the OEM factory image filename or published repository tag.
- Confirm the security patch date (YYYY-MM-DD) on the device equals the vendor’s published patch for that release.
- Verify SDK/API numeric level on the vendor developer pages to ensure app compatibility.
-
Acceptance rules:
- Do not install builds whose fingerprint does not match the vendor image or OTA metadata signature.
- Prefer OTA updates signed by the device maker; when sideloading, verify image SHA-256 and official signature.
- For enterprise fleets, require vendor CVE list and a security-patch date no older than 30 days; for personal devices, prefer patches within 90 days.
-
Troubleshooting steps if indicators mismatch:
- Re-download the official image or check the OEM support page for corrected artifacts.
- Contact vendor or carrier support with the build fingerprint and build ID copied from getprop output.
- Avoid unlocking the bootloader or flashing unsigned images unless instructed by vendor support.
Accept an update only after the build tag, fingerprint, security-patch date and published OEM metadata all match; otherwise reject and seek vendor confirmation.
-
Vivo Y20 Android Version — What Android OS Does It Run?
What to expect out of the box: factory software: Google mobile platform 10; user interface layer: Funtouch OS 10 (stock build). Initial security patch baseline: September 2020 for global shipments. Official major update rollouts to release 11 began in 2021 for specific regions and carriers; final official major-level support and patch cadence depends on region and carrier policy.
How to verify the current system on your phone: open Settings → About phone → Software information (or System updates). Check the build number and the security patch level. For an OTA check, stay on Wi‑Fi, ensure battery >50% and free storage ≥2–3 GB, then tap Check for updates. Back up user data before applying any major upgrade.
If no official upgrade is available: contact the carrier or the manufacturer support channel for a schedule. For extended support beyond official releases, experienced users can install community-maintained firmware (LineageOS, Pixel Experience) – this requires unlocking the bootloader, flashing a custom recovery and creating a full Nandroid backup; warranty may be voided and stability/security guarantees disappear.
Recommended maintenance: enable automatic security updates where offered, verify patch level monthly, keep a verified backup before any system change, and prefer official OTAs for stability. If pursuing aftermarket builds, use device-specific threads on developer forums, confirm device codename matches the ROM, and follow step-by-step instructions precisely.
Out‑of‑the‑Box Android Version
Factory firmware: Funtouch OS 10.5 layered on Google’s mobile platform 10 (API level 29). Apply any available OTA updates and the latest Google Play system patch before enrolling banking or corporate accounts.
Verify the shipped build: Settings → About phone → Software information. If you liked this article and you would like to get even more details concerning 1xbet sign up kindly browse through our own website. Confirm Build number, Baseband version and Security patch level; note the API level cited in the build string if present (API 29 indicates platform 10).
Update checklist for first use: charge above 50%, connect to a stable Wi‑Fi network, back up user data to cloud or local storage, install OTA updates while plugged in, and review the OTA changelog for platform releases or security patch dates.
If you plan to install custom firmware later, check the manufacturer’s bootloader policy and available vendor blobs, expect SafetyNet checks to fail after unlocking, and create a full backup (TWRP or equivalent) before flashing. Use official OTAs for routine security maintenance whenever possible.
Factory Android version by model
Confirm the original operating system release for a specific model by using the exact model code from Settings → About phone or from the retail box, then match that code against the manufacturer’s firmware listings or a trusted firmware database.
On-device check: open Settings → About phone → Build number or Software information to read the factory release imprint. Via USB: run adb (if unlocked) and read ro.build.fingerprint or ro.build.display.id to capture the stock build string; via bootloader use fastboot getvar all to show the product and build identifiers. Use those identifiers to search firmware archives.
Common mapping rule: handsets introduced in 2020 from this series predominantly shipped with release 10; later refresh SKUs and regional variants issued in 2021–2022 frequently arrived with release 11 or release 12. Never assume a release based on marketing name – always confirm against the model code and build fingerprint.
When downloading factory firmware, pick files that exactly match the model code, regional SKU and build fingerprint. If flashing, use the manufacturer’s recovery or official flashing tool and follow the service instructions for that model to avoid mismatched firmware and potential brick risk.
Realme C33 Android Version – Current OS, Updates & Specs
How to verify the installed build: open Settings → About phone → Build number (or Software information) and note the build ID and security patch date. Record those values before proceeding so you can confirm a successful install or roll back if needed. If you have any concerns pertaining to where and how you can make use of 1xbet code, you could call us at the page. If the phone shows a custom recovery or unlocked bootloader, stop and back up immediately.
Key technical profile (expected on this entry-level handset): octa-core Unisoc T612 processor, commonly offered with 3–4 GB RAM and 32–64 GB internal storage with microSD expansion; ~6.5″ HD+ LCD (≈720×1600); main camera around 50 MP with a basic depth/AI assist sensor; front camera ~5 MP; 5,000 mAh battery with low-wattage charging. Treat these numbers as the baseline for compatibility checks when grabbing firmware files or carrier provisioning.
Recommended maintenance and upgrade steps: 1) create a full backup to cloud and local storage; 2) download firmware only via the phone’s built-in software channel or the manufacturer’s official support site; 3) avoid third-party ROMs unless you have verified checksums and a tested recovery method; 4) after a major platform refresh, perform a cache wipe and, if instability persists, a factory reset; 5) retain the previous build ID in case reinstallation is required.
Security and connectivity checklist: enable automatic patch downloads over Wi‑Fi, verify carrier band support before flashing regional firmware, confirm DRM and Widevine status if streaming is important, and periodically check Settings → About phone for new security patch entries. Follow these steps to keep the handset stable, secure and compatible with apps and networks.
Current Android Version Installed
Immediately verify the installed platform release and security patch: open Settings → About phone → Software information and note the release number, build ID and security patch date.
- What to read in the interface:
- Release (numeric): e.g., 12 or 13.
- UI edition string (R Edition or similar).
- Build number (starts with RMX or similar) and Security patch level (date).
- Command-line checks (fast and exact):
- adb shell getprop ro.build.version.release – shows the release number.
- adb shell getprop ro.build.version.security_patch – shows patch date.
- adb shell getprop ro.build.display.id – shows full build string.
- If the release number is lower than 13 or the security patch is older than six months, enable Settings → Software update and check for OTA; if no update appears, contact vendor support with the build number.
- Before any firmware install:
- Create a full backup (user data + app settings).
- Charge battery to at least 50% and use stable Wi‑Fi.
- Free up at least 2–3 GB of internal storage for the package.
- To validate a successful upgrade: repeat the GUI or adb checks above and confirm the security patch date advances and the build ID changes.
- If you see “Go edition” in the software details, expect memory-optimized builds and fewer major platform upgrades; ask support for upgrade policy for that SKU.
Verify Android version in Settings
Open Settings → About phone → Software information and read the Build number plus the Security patch level to confirm the platform release string shown on the device.
If menu labels differ, use the Settings search: type “About”, “Software” or “Build” to jump straight to the right screen; some vendor skins move software details into System or Additional settings.
To obtain exact identifiers enable Developer options (tap Build number seven times), turn on USB debugging, then connect a computer and run: adb shell getprop ro.build.display.id; adb shell getprop ro.build.version.release; adb shell getprop ro.build.version.security_patch; adb shell getprop ro.build.fingerprint. Capture those values for verification against the manufacturer’s release notes.
Check the security patch date against the maker’s monthly security bulletin; if the device shows an older date, request an official firmware upgrade through the handset’s software update tool or contact support. When reporting include Build number, security patch date and build fingerprint and attach a screenshot to speed diagnosis.
- What to read in the interface:
Vivo Y12s Android Version — What Android Does It Run? (Specs & Updates)
Recommendation: Accept this handset only if you are satisfied with a device that ships on Google’s mobile platform release 10 with the manufacturer’s custom skin and limited long-term platform support; choose a newer model preloaded with release 11 or later when guaranteed multiple major platform bumps are required.
The device ships with the Google platform release 10 under the maker’s UI (Funtouch OS 11), powered by a MediaTek Helio P35 processor, a 6.51‑inch HD+ (720×1600) LCD, RAM options of 2 GB or 3 GB, storage tiers of 32 GB or 64 GB with microSD expansion, a dual rear camera array (13 MP main + 2 MP depth), an 8 MP front camera, a 5,000 mAh battery with basic 10 W charging, and a rear fingerprint reader for biometrics.
Update policy and practical steps: Expect security patches for roughly 12–24 months post‑launch and, at best, a single major platform bump on budget lines. To maximize longevity enable automatic security updates, apply only signed vendor packages, check firmware build dates before side‑loading, and back up userdata prior to any system upgrade. In the event you loved this post and you would want to receive more information with regards to promo code 1xbet today generously visit our own webpage. For extended platform life consider community ROMs only after confirming bootloader unlock options and upstream driver support for the model’s SoC and peripherals.
For feature parity with releases 11 and 12 (privacy enhancements, newer background‑process behavior, updated permission controls) buy a handset shipped with those releases or verify the seller’s upgrade commitments; otherwise plan on relying on security patches and cautious sideloading to maintain device safety and app compatibility.

Quick Android version summary
Recommendation: If you need a newer platform release, prepare to install an unofficial custom build; this handset ships with Google’s mobile OS release 10 (Funtouch OS 10.5) and lacks a widely distributed official upgrade to release 11.
Security support: official security patches were issued for roughly two years after launch; do not expect long-term monthly patches beyond that window–check Settings > About phone > Build number to confirm the current firmware and patch level.

App compatibility and performance: release 10 handles the vast majority of apps, but apps requiring later API levels or Play Services features introduced after release 10 may show degraded behavior or reduced feature access.
Upgrade options: for a newer major build, consult established developer communities (XDA, LineageOS) for unofficial releases. Expect to unlock the bootloader, install a custom recovery (TWRP), flash the ROM and optional GApps; this voids warranty and carries risk of bricking.
Practical steps: enable automatic system updates for official OTA packages, keep Google Play Services and Play Store current, make a full backup before any modification, and follow device-specific flashing guides precisely.
Bottom line: keep official updates applied for stability and security; pursue a custom ROM only if you accept the technical risk and can follow community-supported instructions.
Stock Android version
Remain on the factory firmware and apply only official OTA packages from the device maker; manual flashing or third‑party ROMs can void warranty and increase risk of bricking.
- How to confirm stock firmware:
- Open Settings → About phone: note the build number and security patch date.
- Verify bootloader state is “locked” and recovery shows the manufacturer’s signature.
- Run a root-check app or SafetyNet test to confirm no root or modified system files.
- When to accept a manufacturer release:
- Only install packages delivered through Settings → System → System update (OTA).
- If the release notes mention a newer API level or security patch, prefer the OTA over manual packages.
- Backing up before changes:
- Create a full data backup (local + cloud) and export app data where possible.
- Enable OEM account sync for contacts, calendar and photos to simplify recovery.
- Reverting to factory firmware:
- Download the official stock image from the manufacturer’s support site only.
- Use the official flashing tool or the documented SD-card recovery method; follow the provided instructions step by step.
- Expect a full data wipe when flashing stock; restore from backup afterward.
- Security and maintenance recommendations:
- Check the security patch date monthly; install new patches via OTA promptly.
- Avoid sideloading APKs from unverified sources; prefer apps from the official store.
- If long-term vendor support is absent, consider certified aftermarket firmware only after researching compatibility, update frequency, and community reputation.
If you need step‑by‑step commands for verifying the bootloader or flashing an official image, specify your operating system (Windows/macOS/Linux) and I will provide the exact terminal commands and file locations.
- How to confirm stock firmware:
What Android Version Is Oreo? | Android 8.0 & 8.1 Overview
Quick facts: The initial public rollout began on August 21, 2017 (build corresponding to API 26); the follow-up incremental system arrived December 5, 2017 (API 27). The codename for this pair is the “O” release. If you liked this report and you would like to acquire additional details concerning download 1xbet app kindly pay a visit to our own website. API 26 introduced core platform changes; API 27 added machine‑learning and low‑memory optimizations plus vendor modularization work that speeds rollouts on many devices.
Key technical highlights (practical impact): Notification channels (apps must register per‑channel settings so users can control importance and sound); picture‑in‑picture for video apps; an Autofill framework for password managers and form filling; adaptive icons requiring foreground/background layers for proper display; background execution limits that force long tasks into JobScheduler/WorkManager rather than persistent background services; Bluetooth 5 support and Wi‑Fi Aware (NAN); introduction of Project Treble to separate vendor code and accelerate firmware updates; API 27 adds a Neural Networks API for on‑device inference and a Go edition tuned for low‑RAM devices.
Concrete recommendations: For end users – verify “Build number” or “OS release” and the API level in Settings → About phone; keep the device on official updates and apply monthly security patches; enable a trusted password manager via the Autofill framework; turn off background location for nonessential apps and review per‑app notification channels to avoid unwanted alerts. For app teams – target API 26+ and implement notification channels, migrate background work to JobScheduler/WorkManager, adopt the Autofill API for credential handling, supply adaptive icons, and test on both API 26 and API 27 system images (use the NNAPI on API 27 where on‑device acceleration yields latency gains).
What Android Version Is Oreo? Android 8.0 & 8.1 Overview
Upgrade devices to the latest security build for the 2017–2018 Google mobile-OS releases (API level 26 and API level 27) and, for apps, target API 26+ while implementing notification channels and background-execution limits to avoid delivery failures and unexpected service termination.
Public rollout dates: initial platform image published August 21, 2017 (API 26); follow-up maintenance release deployed December 5, 2017 (API 27). Key platform identifiers: API 26 = base release; API 27 = incremental feature and stability updates.
User-facing improvements: adaptive launcher icons (layered foreground/background assets, mipmap-anydpi-v26), notification channels and dots (mandatory channel creation for visible alerts), picture-in-picture mode for video apps (declare support in the manifest), Autofill Framework (system-level credential and form autofill via android:autofillHints), Wi‑Fi Aware (NAN) support, and tightened background execution/implicit-broadcast limits that reduce battery drain.
Developer checklist:
– Create and register NotificationChannel objects before posting notifications; handle varying importance levels and user-managed channel settings.
– Replace long-running background services with JobScheduler/WorkManager or convert to foreground services and call startForeground() within the required time window.
– Stop relying on implicit broadcasts that were limited; use explicit broadcasts, JobScheduler triggers, or ContentObservers where applicable.
– Provide adaptive icon assets and test launcher presentation across form factors.
– Test on emulator system images for API 26 and API 27 and on Project Treble-enabled devices to catch vendor-specific behavior.
Operational steps for device owners and admins: check Settings → System → About for build and patch level, enable automatic system updates where available, back up user data before major upgrades, and verify critical corporate apps against API 26/27 emulator images or physical test devices to confirm notification behavior and background-task reliability.
Version IDs & Release Timeline
Set targetSdkVersion to 27 and validate behavior on API 26 and API 27 images; keep minSdkVersion at a level that matches your user base (commonly 21+) while using support libraries for backward compatibility.
API 26 reached stable release on 2017-08-21 (introduced notification channels, background execution limits, autofill framework and picture-in-picture). API 27 reached stable release on 2017-12-05 (added the Neural Networks API (NNAPI), android.os.SharedMemory and several smaller API additions and fixes).
Developer previews for the line began on 2017-03-21, followed by public betas through spring/summer of 2017; the first stable build (API 26) rolled out in late August 2017, with the maintenance/feature refresh (API 27) finalized in December 2017.
Security updates were distributed monthly by Google during the active support window; OEM cadence varied (Pixel-class devices received monthly updates, many vendors moved to quarterly). Maintain an update policy that treats monthly patches as the baseline for flagship devices and quarterly for wider fleet management.
Practical checklist for developers and release managers: pin CI/emulator images to API 26 and API 27, add automated tests for background execution limits, notification channels and autofill flows, include NNAPI smoke tests if using on-device ML, and document any behavior changes tied to targetSdkVersion 27 in your release notes.
Who Invented Android Phones? History, Key Figures & Timeline
Direct answer: Credit belongs to the original startup team–Andy Rubin, Rich Miner, Nick Sears and Chris White–who founded the project in October 2003; Google acquired the company on August 17, 2005, and that acquisition set the path to the first commercial handset, the HTC Dream (T‑Mobile G1), which shipped on October 22, 2008.
For a factual chronology and accurate attribution, include these milestones in sequence: founding of the startup (Oct 2003); Google purchase (Aug 2005); announcement of the industry consortium, the Open Handset Alliance (November 5, 2007); platform 1.0 release (September 23, 2008); first retail device, HTC Dream (Oct 22, 2008). Note hardware specifics for the Dream: Qualcomm MSM7201A CPU at 528 MHz, 192 MB RAM, and a 3.2‑inch touchscreen–use these specs to demonstrate the gap between early devices and later models.
When structuring your article, prioritize primary sources: the Google acquisition filing and press release (Aug 2005), the Open Handset Alliance announcement (Nov 2007), original product pages and teardowns for HTC Dream (Oct 2008), and contemporaneous reviews from major tech outlets. Emphasize named contributors (Rubin, Miner, Sears, White), major OEM partners (HTC, Motorola, Samsung) and key vendor dates rather than vague generic statements; that produces an evidence‑based narrative and actionable references for readers.
Founders of Android, Inc. (2003)
Answer: Andy Rubin, Rich Miner, Nick Sears and Chris White.
Founding context: The company was formed in October 2003 in Palo Alto, CA; the four founders combined expertise in embedded engineering, carrier relations, business development and user-interface design. Google acquired the startup in August 2005 for roughly $50 million.
Andy Rubin – technical lead: led platform architecture and hardware integration; prior to the startup he co‑founded Danger (maker of the Sidekick) and built teams focused on mobile engineering. After the acquisition he led Google’s mobile projects and later launched a consumer hardware venture.
Rich Miner – product and partnerships: brought mobile research and startup experience, handled early industry outreach and investor relations; after the buyout he moved into leadership roles at Google and subsequently into venture investing focused on mobile and applications.
Nick Sears – business/telecom lead, CEO: provided carrier relationships and commercial strategy, negotiated early operator discussions and business models that made the platform attractive to acquirers and partners.
Chris White – UI/interaction lead: produced the prototype user‑interface demo and interaction design work that clarified product vision and helped secure both funding and acquisition interest; continued to work on user experience after the acquisition.
Research recommendations: consult contemporaneous reporting from August 2005 (major tech outlets and the Google press release), founders’ interviews and conference talks, early patent filings and archived versions of the company website via the Wayback Machine, and LinkedIn or conference bios for career timelines.
Andy Rubin: role, vision and technical leadership
Recommend adopting Rubin’s developer-first playbook: deliver a complete SDK, emulator and reference device early, pair that with clear APIs and sample apps to accelerate third-party adoption.
As engineering lead he prioritized a lightweight Linux-based kernel, a custom JVM-compatible runtime (Dalvik) optimized for limited memory and battery, and an inter-process messaging model that allowed apps and system components to communicate without tight coupling. He insisted on a permission-driven app model and sandboxing to limit privilege escalation while keeping the API surface small and consistent.
Technical practices he enforced: strict vendor abstraction layers so silicon and driver differences don’t break platform binaries; automated compatibility testing to protect app and OS interoperability; aggressive profiling and instrumentation for power and memory; and an early reference hardware image with conservative driver sets to reduce fragmentation during OEM bring-up.
Management techniques worth copying: recruit engineers with embedded and systems expertise, require frequent working prototypes (6–8 week cadence), gate merges with continuous integration and regression suites, and create a developer advocacy team that publishes sample code, migration guides and performance benchmarks alongside each SDK release.
Concrete actions for product teams: 1) publish stable public APIs and a compatibility test suite before wide OEM distribution; 2) invest in a low-overhead runtime with ahead-of-time/JIT strategies for throughput and power; 3) maintain an upstream-first kernel policy and a thin HAL to isolate vendor changes; 4) provide emulators that expose power/perf instrumentation so developers can optimize apps pre-deployment.
In the event you beloved this short article along with you desire to obtain more details relating to 1xbet registration promo code generously check out the web-site.
Best Android Apps to Recover Permanently Deleted Photos — Free & Easy
Install DiskDigger on your smartphone and run a deep signature scan right away: choose no-root mode if the device isn’t rooted, enable full file-type search for JPG/PNG/HEIC, and export restored images to an external SD card or cloud storage (Google Drive, OneDrive) instead of internal memory.
For the highest chance of success, image the device and run a PC-side tool next: use PhotoRec (part of TestDisk) to perform file carving from a disk image created with dd or a GUI imager. Typical recovery ranges for common formats when scanning soon after removal are roughly 60–95% for standard JPEGs and about 50–80% for HEIC; RAW and heavily compressed formats vary more and depend on overwrite and fragmentation.
Immediate actions: stop writing to the phone, enable airplane mode, remove any external card, and avoid installing additional software to internal storage. If possible, connect the device to a computer and create a full image before attempting restores – working from an image avoids further data loss on the original media.
If mobile-based attempts fail, consider a paid desktop utility or a data-retrieval specialist who can perform block-level analysis and reconstruction. Use encrypted backups or cloud archives for future protection, and prioritize regular automatic syncing to prevent permanent loss of important images.
Before You Start: Quick Prep Steps
Enable Airplane mode immediately to prevent background writes and network-driven syncs.
Stop using the device for any new activity – do not take pictures, install software, stream, or save files. Continued use increases the chance that erased data blocks will be overwritten.
If the device has a removable microSD card, eject it and work from the card using a USB adapter with write-protect switch when available. Imaging or copying from the card via a card reader preserves its state and avoids further writes.
Check cloud backups and recycle/trash folders linked to your account(s): Google Drive, OneDrive, Dropbox, Samsung Cloud, and any OEM backup service. Look in each service’s Trash/Recycle section (many providers retain items for 30–60 days) before attempting local procedures.
Enable Developer options and USB debugging on the phone: Settings → About phone → tap Build number 7 times → Settings → System → Developer options → USB debugging. Set USB connection mode to “File transfer (MTP)” when connecting to a PC.
Prepare a host computer: install OEM USB drivers and the latest Google Platform Tools (adb). Verify connection with the command: adb devices – the device should appear in the list before any file operations.
If the device is rooted and you plan to create a full image, ensure the host drive has free space ≥ device total storage and keep the phone plugged in. Example imaging command (root required): adb shell su -c “dd if=/dev/block/mmcblk0 bs=4096” redirected to storage, then adb pull the image file to the PC.
For non-root workflows, prioritize copying visible media folders first: pull /sdcard/DCIM, /sdcard/Pictures and any app-specific directories. Example: adb pull /sdcard/DCIM C:\backup\DCIM. Do not run mass-cleaners or cache clearers before copying.
Allocate stable power and storage: keep the battery >50% or use a charger during operations; use an external drive or PC with at least the phone’s used-storage free (recommendation: free space ≥ used bytes) to store images or exports.
Document device details and timestamps before changes: note model, OS build, encryption status, mount points, and the exact time you stopped using the device. These data help choose the correct extraction method and preserve evidence integrity.
Stop using the device immediately to prevent overwrite
Power the phone off right away; do not unlock it, open any media viewers, take new pictures, or install programs.
If the storage is removable, eject the microSD card and store it in an anti‑static bag. Label the card and image it on a computer before attempting any work: on Linux, use dd if=/dev/sdX of=~/sdcard.img bs=4M conv=sync,noerror status=progress. On Windows, create a raw image with Win32 Disk Imager or HDD Raw Copy Tool.
For internal eMMC/UFS storage, do not boot or connect the device to a PC for casual file access. Modern internal flash frequently supports TRIM (f2fs/ext4), which can zero freed blocks automatically and make file restoration unlikely. If the pictures are valuable, stop all interaction and consult a professional service that can perform read‑only imaging or chip‑off extraction.
If you cannot power off immediately, disable Wi‑Fi, mobile data and Bluetooth, and switch to Airplane Mode; then power down as soon as possible. Avoid signing into accounts or allowing any sync/backup process to run, since account activity can create writes and metadata changes.
Do not charge, update, back up, browse the gallery, or run antivirus scans on the device; each write operation reduces the odds of successful file restoration. Keep the device powered off in a dry place and avoid inserting other storage media that could trigger background processes.
Quick checklist: power off; remove and image removable cards; do not install or run recovery programs on the phone; prevent network/backup activity; if internal storage is involved and data is critical, seek a specialist. Typical recovery likelihoods vary: with an unused microSD card the chance of restoring erased images can be high (often 60–90% depending on subsequent writes); for internal flash with TRIM enabled the probability can fall below 10% once TRIM runs.
If you beloved this informative article and you wish to get guidance relating to 1xbet app apk kindly stop by our site.