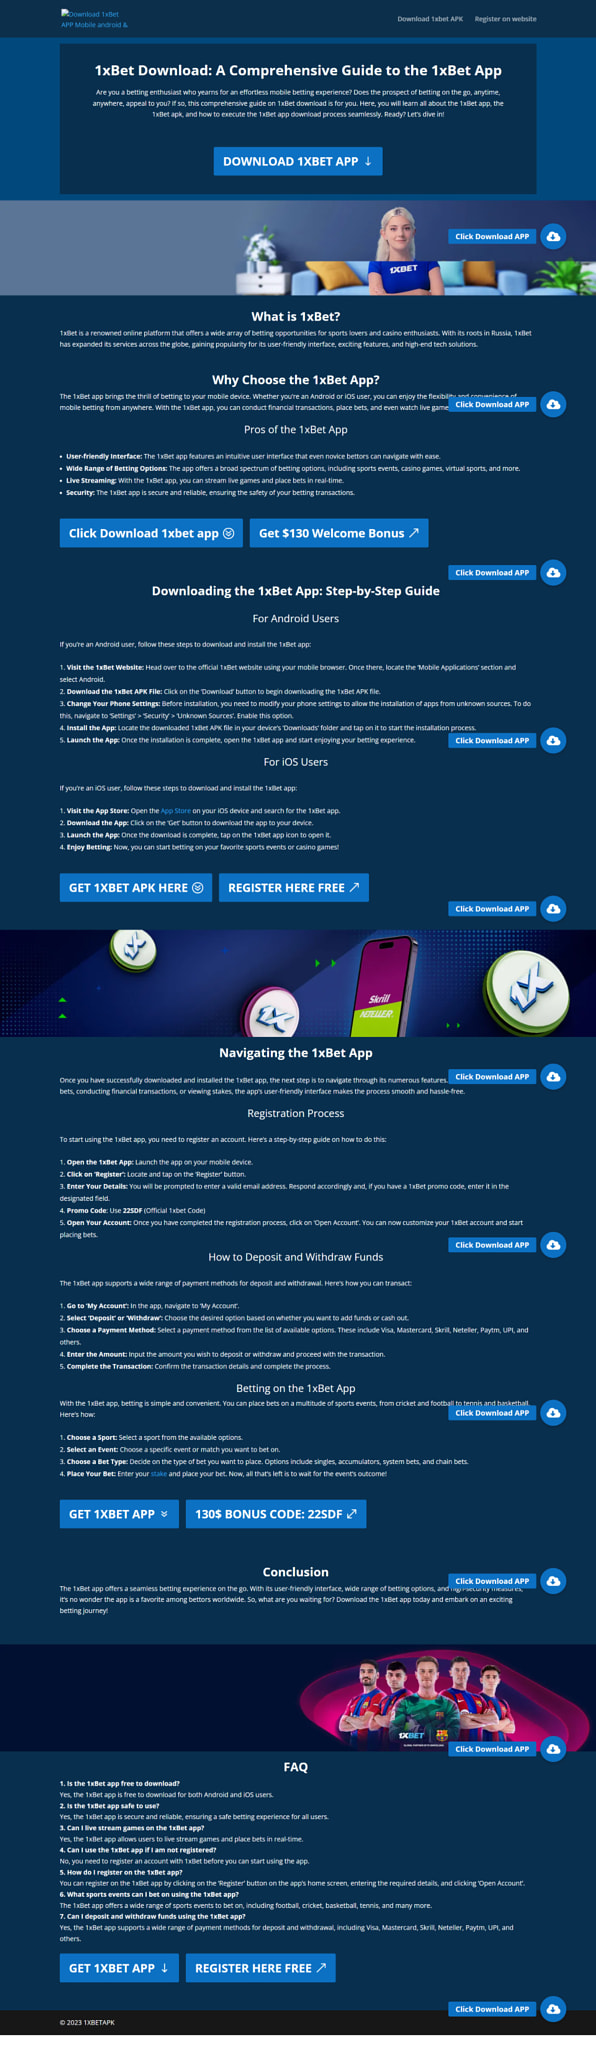
Why Does Your Android Phone Suddenly Turn Off? Causes & Quick Fixes
Immediate action: check battery health in Settings → Battery (replace if maximum capacity reads ≤ 80% or status is “Poor”); connect a known-good charger and run adb shell dumpsys battery to verify level, health and temperature; if the device powers down again, boot into safe mode to isolate third-party apps and back up critical data before further steps.
Hardware causes dominate: degraded cells with high internal resistance produce voltage collapse under peak load, leading to abrupt power loss. Replace the cell when capacity falls below ~80% of original. Thermal thresholds: SoC throttling typically starts near 45–55°C, while critical shutdowns occur around 85–95°C; battery management will refuse to charge or will cut output outside roughly -10–60°C. Use a USB power meter to confirm charger output (normal 5.0V; fast-charge profiles 9–12V depending on protocol) and observe charge current – sustained currents <500mA usually indicate a bad cable, adapter or port.
Software/firmware faults can cause kernel panics or watchdog-triggered reboots. Capture logs with adb logcat -d and search for “FATAL EXCEPTION”, “kernel panic” or repeated reboot timestamps; generate adb bugreport when possible. Recommended sequence: update system and apps, uninstall recently added apps, clear app caches, boot to recovery and wipe cache partition, then retest. Reserve factory reset until after a full data backup if all else fails.
Practical checklist: 1) remove case and stress-test to detect overheating; 2) boot in safe mode to rule out rogue apps; 3) swap charger/cable and measure charging current; 4) inspect battery for swelling and connectors for corrosion; 5) verify power-button function and moisture indicators; 6) reseat removable batteries; 7) for sealed units, arrange professional battery replacement or board-level diagnostics. If logs show repeated thermal spikes or kernel faults, stop regular use and seek service to avoid data loss or hazard.
Immediate checks to perform right after shutdown
Force a restart: press and hold the power key + volume down for 10–15 seconds; if no response, continue up to 30 seconds, release for 10 seconds, then try again.
-
Charger and cable test
- Use the original charger or a known-good charger. Typical outputs: 5V/1A, 5V/2A, 9V/2A (USB‑PD/QC).
- Swap cables and wall adapters–cheap/old cables often fail. If available, measure current with a USB power meter; expected charging current when powered-down should usually exceed 100 mA. Values under 50–100 mA indicate a bad cable/charger or port fault.
- Try a different outlet and a different USB port on a desktop/laptop (some laptop ports supply limited current when sleeping).
-
Visual and tactile inspection
- Remove case and inspect charging port for lint, corrosion or bent pins; clear debris with compressed air or a wooden toothpick–do not insert metal tools.
- Check for battery swelling: separation of the back cover, bulge, or a pop in the case. If the battery appears swollen, stop charging and arrange a battery replacement; avoid puncturing.
- Look for liquid damage in the SIM tray or under removable covers: a red or pink Liquid Contact Indicator (LCI) usually means exposure to moisture–do not plug into power if LCI shows contact.
-
Temperature and recent conditions
- If the unit was exposed to >45°C (in direct sun or left in a hot car) or below 0°C, allow it to cool or warm to room temperature (20–25°C) for 15–60 minutes before retrying to boot or charge.
- If the device felt very hot before shutdown, wait at least 30 minutes; then try charging with a low-wattage charger (5V/1A) for 10–15 minutes and observe any warm-up or LED activity.
-
Button and connector checks
- Ensure the power button and volume keys are not stuck. Press each several times–sticky buttons can prevent startups or trigger repeated shutdown behavior.
- Test wireless charging (if supported) with a known-good pad; successful wireless charge LED/animation indicates internal power circuitry is alive even if the display remains dark.
-
Boot-path diagnostics
- Attempt recovery/bootloader: press and hold power + volume up (or power + volume down on some models) for 10–20 seconds. Different manufacturers use different combos–if unsure, try both variants once each with a 30-second pause between attempts.
- Connect to a PC via USB and watch Device Manager (Windows) or System Information (macOS). If the handset enumerates as a USB device, try “adb devices” or “fastboot devices” only if familiar; recognition indicates the bootloader or OS has partial functionality.
-
Short-term data preservation
- If the unit becomes responsive briefly, immediately back up critical data (photos, contacts, messages) to cloud storage or via USB to a computer before further troubleshooting.
-
When to stop and seek professional help
- Do not attempt battery replacement or board-level repair at home unless trained. If none of the above produce signs of life (LED, vibration, USB enumeration) after 30–60 minutes of tests, note serial/IMEI and take the handset to an authorized service center.
- Document the sequence of events (battery level prior to shutdown, temperature, recent impacts or liquid exposure) to speed up diagnostics at the repair shop.
Verify battery level and recent charge history
Record the exact last-full-charge timestamp, the percentage shown before the unexpected shutdown, and the device’s reported full-charge capacity (mAh or %).
Open Settings → Battery → Battery usage (or Battery health) and note: Last full charge time, screen-on time since full, and the top three draining apps. If the OS view is limited, run: adb shell dumpsys battery to obtain fields such as level (0–100), voltage (mV), temperature (tenths °C), status, and health. Convert temperature by dividing the dumpsys value by 10 (e.g., 320 → 32.0 °C). Voltage is already in millivolts.
Interpret values using these practical thresholds: full-charge voltage ≈ 4100–4200 mV; nominal/resting voltage ≈ 3700 mV; if full-charge voltage reads consistently below 4100 mV the cell shows aging. Maximum capacity above 80% is acceptable, 70–80% is moderate wear, under 70% indicates replacement should be considered. Typical useful cycle count before noticeable capacity loss: ~300–500 cycles.
Check for rapid percentage drops: a decline of more than 5–10 percentage points within a few minutes under light use or idle suggests voltage-reading instability or failing cells. In dumpsys batterystats, search for abrupt “discharge” entries and correlate timestamps with app activity or wakelocks.

Measure charging current and charger behavior: typical currents – USB 2.0 ≈ 500 mA, USB 3.0 ≈ 900 mA, standard wall chargers ≈ 1000–3000 mA depending on protocol. If measured charging current is less than expected by >30%, swap cable and charger, then retest. In case you loved this short article and you want to receive more details concerning 1xbet login registration generously visit our internet site. Use AccuBattery or similar to log mA, mAh charged, and estimated remaining capacity over several cycles.
If temperature during charge exceeds 45 °C or spikes to > 50 °C, stop charging and inspect the charging hardware; thermal stress shortens cell life and can trigger sudden shutdowns. For erratic voltage, low full-charge capacity, or repeated rapid drops despite using a known-good charger and cable, plan a battery replacement or professional service; preserve the recorded dumpsys and app logs to show to the technician.
-
Smart TV vs Android TV – Key Differences, Pros & Which to Choose

Google-powered sets deliver the broadest app catalog (thousands of streaming and game apps), native Chromecast support and tighter integration with Google Assistant. Expect more frequent app updates via the Play ecosystem and better compatibility with third‑party controllers and media players. Verify that the model includes at least 4K HDR codecs (HEVC, VP9, AV1) and Dolby Vision/Dolby Atmos if you use premium services.
Vendor platforms vary by maker: some offer excellent upscaling and color processing on budget hardware, others limit app selection to a curated store. Firmware update cadence is inconsistent – some makers push quarterly patches, others only for flagship lines – so confirm the vendor’s update policy before buying. For casual viewing, a vendor interface can be faster and less cluttered.
Hardware and latency: prefer models with HDMI 2.1 for VRR and ALLM if you play consoles; measured input lag in modern sets typically ranges from ~10–30 ms in game mode. Look for at least 2–4 GB RAM and 8–16 GB internal storage on internet-enabled sets to avoid slow app performance and frequent cache limits.
Buyers focused on streaming quality and app choice should opt for Google-based platforms; those focused on price, simplified navigation or proprietary picture tuning should consider manufacturer UIs. Before purchase, check supported codecs, HDR formats, number of HDMI ports, update policy and the privacy/telemetry settings listed in the product documentation.
Core technical differences
Recommendation: If you need consistent 4K/DRM support, frequent security updates and full access to Google-backed app distribution, pick a Google-backed operating system; if you prioritise lower cost, built-in broadcast tuners or vendor-specific picture/audio processing, pick a manufacturer-built platform.
System-on-Chip and performance: Manufacturer platforms often use low- to mid-range SoCs (MediaTek, Realtek, older Amlogic) with ARM cores commonly at Cortex-A53/A55 class, typical clock ranges 1.2–1.8 GHz and GPUs like Mali-450/Mali-G31; RAM frequently 512 MB–2 GB and flash 4–8 GB eMMC. Google-backed devices trend toward newer SoCs (Amlogic S9xx family, newer MediaTek chips) with quad-to-octa core Cortex-A55/A76 variants, GPUs with better Vulkan/OpenGL ES support and RAM 2–4 GB, flash 8–16 GB. For gaming or low-latency apps target devices with >=2 GB RAM and a modern Mali G-series or comparable GPU.
Video codec and hardware decode: Common hardware decode on vendor platforms: H.264 and H.265 (HEVC); VP9 support varies. Here is more on 1xbet ios review the web page. Google-backed devices increasingly include AV1 hardware decode on 2021+ SoCs. If you stream 4K HDR from major services, verify native hardware AV1 or HEVC decode and HDR pipeline (HDR10, Dolby Vision, HDR10+ support varies by vendor).
DRM and streaming quality: Widevine L1 or Microsoft PlayReady L1 presence determines available streaming resolution from major providers. Many manufacturer systems ship with Widevine L3 or no L1 certification, limiting some services to SD or HD. Google-backed platforms more frequently carry Widevine L1 and PlayReady support; always check vendor DRM certification before expecting 4K/DRM playback.
App distribution and sideloading: Google-backed platforms provide an established app store ecosystem and allow APK sideloading plus developer tooling (ADB, developer options). Manufacturer stores are curated, have fewer titles and often restrict sideloading and background services. For custom apps or emulators prefer a platform with ADB access and a broad store presence.
Updates, security and system services: Expect quarterly or irregular OTA updates on many manufacturer platforms; security patch cadence is often slower. Google-backed devices typically receive more regular platform updates, Play Services security improvements and a stronger anti-malware pipeline. Verified boot, SELinux enforcement and Play Protect-style scanning are more common on Google-backed systems.
Input, peripherals and HDMI features: Support for gamepad HID, Bluetooth LE controllers, USB accessories and features like ALLM, VRR and eARC depends on both hardware (HDMI 2.1 port and SoC/pipeline) and OS-level drivers. Manufacturer firmwares sometimes implement vendor-specific remote controls and TV-tuner passthrough that integrate tightly with picture processing; for maximal peripheral compatibility and gaming features verify HDMI 2.1 support and low-latency modes on the spec sheet.
Practical checklist before purchase: 1) Verify DRM level (Widevine L1/PlayReady L1) for target streaming services. 2) Confirm hardware decode for required codecs (HEVC/VP9/AV1) at desired resolution. 3) Check RAM/storage sizes if you plan to install many apps or use emulators. 4) Inspect SoC family and GPU for gaming or UI smoothness. 5) Review OTA update policy and developer access if sideloading or debugging is needed.
Operating system architecture and vendor control
Pick a device running an AOSP-based stack with signed OTA updates, a published update policy of at least 2 years for major OS releases and regular monthly security patches, plus hardware-backed DRM (Widevine L1) and hardware decoding for HEVC and AV1 to guarantee 4K HDR playback.
The software stack splits into discrete layers: Linux kernel (SoC vendor sources and patches), vendor kernel modules/firmware, Hardware Abstraction Layer (HAL) and vendor-specific frameworks, the system runtime and app framework, and the app store/package manager. Favor products that document kernel version and upstream LTS status (prefer kernel >= 4.19; 5.4 or newer is better), publish vendor kernel trees, and expose which HALs are proprietary vs. standard – that directly affects driver updates and long-term compatibility with new codecs and DRM updates.
Vendors exert control in four practical ways: UI/launcher customization and preinstalled apps; closed-source SoC blobs that prevent kernel upgrades; locked bootloaders that block custom images; and selective exposure of APIs (limiting sideloading or background process behavior). Verify whether the manufacturer provides developer images, an unlock path, or official firmware archives. Devices without an unlock option commonly lose security and feature updates faster because vendors cannot accept third-party maintenance.
Streaming quality and stream authorization depend on vendor decisions too. Require explicit support lists that include: Widevine L1 (for 4K DRM), VP9 hardware decode (profile 0/2) and AV1 decode offload where offered, HDR10/Dolby Vision support if you need HDR, and passthrough for Dolby Atmos/DTS if you use external receivers. Absence of licensed codecs forces software decoding or blocked streams from major services.
Quick checklist to evaluate vendor control and architecture: confirm AOSP base and visible kernel version; check for published OTA cadence and security-patch schedule; insist on Widevine L1 + hardware AV1/HEVC; verify bootloader policy or developer support; prefer vendors that publish kernel sources and vendor blobs. Secure update guarantees and open vendor practices lengthen usable life and reduce post-purchase restrictions.
Redmi Note 8 Android Version – What Android Does It Run?
Answer: This model left the factory running mobile platform 9 (API 28) and received official upgrades to platform 10 (API 29); for platform 11 or newer you will need a community-maintained build such as LineageOS 18.1/19.0. Keep official MIUI releases if you require the highest stability and DRM support; choose a reputable custom ROM only if you accept unlocked-bootloader trade-offs.
Check the current system on-device via Settings → About phone → System update (inspect the MIUI build and system release). If you cherished this posting and you would like to obtain much more facts relating to 1xbet promo code free spins kindly check out our own web-page. From a computer use ADB: adb shell getprop ro.build.version.release and adb shell getprop ro.build.version.sdk. SDK mapping examples: 28 → platform 9, 29 → platform 10, 30 → platform 11, 31 → platform 12. Example output for a device on platform 10 will show “10” from the first command and “29” from the second.
To move to a community image follow a strict sequence: unlock the bootloader with the official unlock tool, create a full backup (TWRP or Nandroid), then flash a custom recovery. Common commands: adb reboot bootloader, fastboot flash recovery twrp.img, fastboot reboot. Install the ROM via recovery sideload or fastboot update packages; obtain files only from trusted sources (official vendor pages, XDA, LineageOS). Maintain a local copy of the stock fastboot/fastboot image to restore in case of failure.
Be aware of functional trade-offs: unlocking and custom firmware can break Widevine L1, impacting banking and DRM-heavy streaming apps. For long-term security keep monthly MIUI updates when available; if extending major platform support is the goal, pick a well-updated community build, verify checksums and signatures before flashing, and keep a tested recovery backup ready. If DRM and app compatibility matter most, stay on official builds; if new platform features matter most, plan for unlocking, backups and possible compromises.

Official Android and MIUI history
Recommendation: Stay on the latest official MIUI Stable build available for your region and install updates only via the system updater after a full backup; use official fastboot/recovery packages from the vendor site when rolling back or performing a clean flash.
-
How to confirm current OS base and MIUI build:

- Open Settings → About phone → check “MIUI version” and “Security patch level”.
- Or via ADB: adb shell getprop ro.miui.ui.version.name (MIUI) and adb shell getprop ro.build.version.release (OS base); adb shell getprop ro.build.version.security_patch for patch date.
-
Where to find the official release history and downloads:
- MIUI official update pages and the Mi Community changelog archive list all stable, beta and recovery/fastboot ROMs by device codename.
- Use the vendor’s firmware repository to download recovery ROMs (.zip) for OTA or fastboot ROMs (.tgz/.tgz extracted) for MiFlash.
- Verify release notes for the build tag and target region (Global, China, India, EEA) before applying.
-
Interpreting rollout and support status:
- Official updates are usually staged; if an OTA is not visible, check the changelog entry and wait for staged rollout completion.
- Check the last security patch date: if it is older than 12 months, expect official security maintenance to have ceased and plan alternatives.
- Major OS-base upgrades are listed in MIUI release notes; compare your MIUI build number to the archive to see which major bases were applied.
-
Safe update and rollback practices:
- Backup apps and data (use Mi Cloud and local backup) before any update or flash.
- For recovery updates use the built-in updater app. For full reflash use the fastboot package with MiFlash on a PC.
- To rollback to an earlier official build, obtain the official fastboot ROM for the device codename and use MiFlash with the “clean all” option; unlocking bootloader may be required for some operations.
-
When official support ends – recommended routes:

- If you need newer OS features or security updates beyond official support, check active custom projects (LineageOS, Pixel Experience) for the device codename and prefer maintained builds with verified maintainers.
- Expect trade-offs: custom firmware can improve OS-base recency but may remove some vendor features (camera optimizations, proprietary services, DRM levels).
- Only install custom builds from trusted sources; verify checksums and follow device-specific installation guides on developer forums.
-
Quick checklist before installing any ROM:
- Confirm MIUI changelog entry and region tag for the build.
- Record current build string (Settings or adb) and export a full backup.
- Ensure battery ≥50% and a stable USB connection for fastboot flashes.
- Keep a recovery plan: official fastboot ROM and instructions for re-locking the bootloader if needed.
Android version at retail launch
Shipped from stores with Google’s 9.0 “Pie” release layered by MIUI 10; the commercial rollout began in August 2019 for the 8-series handset.
To verify on a unit before purchase: open Settings → About phone → check “MIUI version” and the “Base OS” entry (should read 9.0 / Pie on fresh retail firmware). Also confirm the build date and region tag (Global/China) in the MIUI string to avoid units carrying a different regional ROM.
Official incremental upgrades to the 10 (Q) major release were issued in the months after launch; if you need a later Google OS release, confirm the device has received and installed OTA updates. For buyers of pre-owned units, insist the seller applies available system updates and performs a factory reset in front of you.
If long-term platform updates are a priority, check the manufacturer’s update tracker for this specific model or consider community-supported custom firmware–otherwise expect stock retail units to have started life on 9.0 Pie with MIUI 10.
-
What Android Version Does Redmi 10 Run? | Redmi 10 OS & Specs
Out-of-the-box software: Global and most regional units arrive on Google’s mobile OS release 11 layered with MIUI 12.5. Official over-the-air updates have been issued that bring MIUI 13, which uses Google’s mobile platform release 12 on supported builds; availability depends on your region and carrier.
How to verify and update: Open Settings > About phone > Software information to read the current OS release and MIUI build. Use Settings > System update or the MIUI Updater app to fetch OTAs. Before installing a major platform update, back up user data, connect the charger, and use Wi‑Fi. For manual flashes use official ROMs from Xiaomi’s regional support pages and follow bootloader-unlock requirements; manual flashing will erase user data.

Security and support guidance: Check the “Security patch level” field in About phone; apply monthly or quarterly security updates as they arrive. If guaranteed long-term platform upgrades are a priority, confirm the update roadmap for your market on Xiaomi support pages or community trackers – this model typically receives one major platform bump in many regions.
Key hardware summary: MediaTek Helio G88 chipset, up to 6 GB RAM, up to 128 GB internal storage plus microSD expansion, 6.5-inch FHD+ 90 Hz LCD, 50 MP main camera (with additional wide/macro modules), 8 MP front-facing sensor, 5,000 mAh battery with 18W fast charging, dual SIM support.
Practical recommendations: Enable automatic updates for security patches, confirm carrier/unlocker restrictions before seeking unofficial builds, and keep a current backup before any major system change. For developers or power users seeking newer platform releases sooner, monitor official Xiaomi builds for your device codename and prefer stable regional ROMs to avoid compatibility issues.
What Android Version Does Redmi 10 Run? Redmi 10 OS & Specs
Keep the handset on MIUI 12.5 based on Google’s mobile OS release 11 out of the box; upgrade to MIUI 13 (OS release 12) where OTA is offered, enable automatic updates and install security patches promptly.
- Check current system build:
- Settings → About phone → System information.
- Look for MIUI build string and “OS release” or “Platform release” entry (shows the Google mobile OS release number).
- Note the security patch date for update currency.
- OTA update steps:
- Settings → About phone → System update → Check for updates.
- Ensure battery ≥50% and stable Wi‑Fi before downloading a full ROM.
- Back up user data (Mi Cloud / local backup) before applying major updates.
- Manual update / recovery:
- Download official recovery ROM matching your region/SKU from Xiaomi servers.
- Use the updater app or fastboot tools per Xiaomi instructions; unlocking bootloader voids warranty.
- After a major OS release, perform a factory reset if apps behave erratically (backup first).
- Update eligibility and schedule:
- Initial shipment: MIUI 12.5 on Google mobile OS release 11.
- Some regional SKUs received MIUI 13 based on release 12; availability depends on carrier/region.
- Xiaomi’s budget lineup typically gets one to two major platform upgrades and regular security patches for the first 24–36 months; confirm exact policy on the official support page for your SKU.
- Post-update maintenance:
- Clear system cache and check app updates in Google Play (or system store) after a major release.
- Revoke and re-grant sensitive permissions for misbehaving apps.
- Disable background sync for seldom-used apps to stabilize battery after an upgrade.
- Custom firmware and advanced options:
- Unofficial builds exist on community sites; evaluate maturity, security, and feature parity before switching.
- Unlock bootloader only if comfortable with warranty implications and potential instability.
- Follow XDA threads specific to your SKU for installation guides and recovery images.
For precise update availability, enter your device IMEI/SKU on the manufacturer’s support portal or check the system updater for OTA notices tied to your region.
Shipped Android and MIUI at launch
Update to the newest stable MIUI build and security patch as the first action; the 10 model left the factory with OS 11–based MIUI 12.5 out of the box.

Launch firmware details
Launched August 2021 with a stock configuration of MIUI 12. If you have any kind of questions pertaining to where and just how to make use of promo code 1xbet free, you can call us at our page. 5 layered on OS 11. Out‑of‑box firmware focused on display tuning (adaptive refresh handling), memory management enhancements and camera algorithm presets tuned for the 50MP sensor. Initial security patch corresponds to mid‑2021 monthly releases for factory images.
Immediate recommendations
Before applying any major_MIUI upgrade: back up user data to cloud or local storage; ensure battery level above 50% and a stable Wi‑Fi connection; free at least 5–8 GB of internal space to avoid update failures. Use the built‑in system updater (Settings → About phone → System update) and choose the stable channel unless you accept beta risks. After a major OS 12‑based MIUI upgrade, verify app compatibility and, if you see persistent instability, perform a factory reset only after a full backup. Keep the phone on official releases to retain monthly security patches and warranty coverage; avoid unlocking the bootloader or installing third‑party images unless you have experience and accept potential support loss.
- Check current system build:
What Is Android Firmware? Definition, Types & How to Update
Install only official OTA packages or factory images from the device vendor. Create a complete backup first (cloud sync plus local copy of photos and an application data export where possible); ensure battery is ≥80% and use a data-capable USB cable and stable port; verify downloaded image integrity against the vendor’s SHA-256 checksum before flashing.
Prepare the handset for flashing. Enable Developer options (tap Build number seven times), enable USB debugging and OEM unlocking if a manual flash is required. Check bootloader status with ‘fastboot flashing getvar unlocked’ or the vendor tool; remember that unlocking typically triggers a factory reset and can affect encryption and warranty. Use official platform-tools or the vendor-recommended utility (for example, Odin on certain brands) and follow the manufacturer’s exact command sequence to avoid bricking.

Pick the path that matches your tolerance for risk: official OTA delivered via Settings preserves vendor integrity checks and can keep user data, ‘adb sideload’ is useful when OTA fails, and manual flashing of factory images offers the quickest recovery but carries the highest risk. Keep a copy of the original build and recovery, record build number and bootloader state, test core functions (telephony, Wi‑Fi, biometric unlock, full-disk encryption) after the process, and consult the vendor guide or model-specific community threads for verified checksums and commands for your exact model.
Firmware vs Operating System: practical distinctions
Recommendation: modify low-level images (boot, radio, recovery) only to fix hardware behavior or boot failures; apply a new system release for UI, app framework and security patches.
- Scope and responsibility
- Firmware: hardware initialization, bootloader, radio/baseband, power management and vendor blobs.
- Operating system: system services, framework APIs, user interface, app runtime and package management.
- Storage and partitions
- Boot partition: kernel + ramdisk (typically 16–64 MB). Replace when kernel-level fixes are needed.
- Recovery: recovery image (16–64 MB). Used for flashing and restore operations.
- Radio / modem: separate binary blobs (from a few MB to >100 MB) stored in dedicated partitions.
- System / vendor: OS files and vendor libraries (system images commonly 1–4 GB; vendor 50–500 MB).
- A/B schemes: two system sets for seamless switching; firmware parts may remain single-slot.
- Change frequency and delivery
- Firmware changes are infrequent, high-risk, and often delivered as full images via manufacturer tools or service centers.
- OS releases and security patches are distributed more regularly, via incremental packages or full images.
- Risk profile and recovery
- Flashing incorrect firmware can brick hardware-level functionality (radio, sensors). Recovery may require emergency modes (EDL, JTAG) or manufacturer service.
- OS flashes usually affect apps and UI; soft brick recovery is often possible from custom or stock recovery images and backups.
- Security and verification
- Secure boot / verified boot validate signatures before execution; firmware images and bootloader are typically signed by OEM keys.
- OS packages may use signature checks and dm-verity to prevent tampering with system partitions.
- Practical file types and tools
- Common image extensions: .img, .bin, .elf; package containers: .zip, .tar.
- Flashing tools by chipset/OEM: fastboot, adb sideload, Odin (Samsung), Mi Flash, SP Flash Tool, QPST; use the tool matching device architecture.
- Commands (examples): fastboot flash boot boot.img; fastboot flash system system.img; adb sideload package.zip.
Checklist before flashing low-level pieces

- Confirm exact model and hardware revision; check build fingerprint and carrier variant.
- Backup user data and make a full image (nandroid) if possible.
- Verify file checksums and digital signatures supplied by vendor.
- Ensure battery ≥50% and USB connection stable.
- Unlock bootloader only when necessary; relock after successful procedure if security is required.
- Test radio, sensors and camera immediately after flashing vendor firmware.
- Keep official recovery media or service contacts available for emergency restoration.
Short decision guide
- If the problem is lost network, modem crashes or bootloop before OS loads → target firmware (boot, radio, bootloader).
- If the problem is UI glitches, app crashes, API regressions or security patches → replace the system image or install a system patch package.
- If unsure, prefer OEM-supplied full images and follow vendor instructions; avoid mixing firmware from different revisions or carriers.
What firmware actually controls on Android devices
Use only vendor-signed low-level images for bootloader, baseband/modem, PMIC and secure-element modules; verify signatures and back up the EFS/IMEI area before making changes.
Low-level code governs hardware initialization and security: on most SoCs an immutable boot ROM hands control to a staged bootloader (sbl1/abl), which performs cryptographic verification of the next stages and enforces bootloader lock state. TrustZone/TEE blobs (tz) and keymaster store cryptographic keys and biometric data; replacing or corrupting these components often destroys attestation and stored keys.
Radio/baseband firmware (modem, NON-HLOS.bin or vendor modem partition) implements cellular stacks, SIM authentication, IMS/VoLTE, emergency-call procedures and regulatory radio parameters. Incompatible radio blobs commonly produce loss of network, wrong band support or IMEI/EFS corruption.
Power-management firmware (rpm, pmic) and thermal microcode control charging algorithms, fuel-gauge reporting, voltage rails and thermal throttling. Incorrect versions can cause fast battery drain, overheating or failed charging. Storage controller firmware inside UFS/eMMC manages wear-leveling, bad-block tables and hardware encryption; damaging it can render the storage unreadable.
Peripherals often contain their own microcode: Wi‑Fi/Bluetooth chips, touchscreen controllers, camera ISPs, sensor hubs and audio DSPs (adsp/dsp) run proprietary binaries that handle radio stacks, touch sampling, image processing, sensor fusion and low-power always-on tasks. Replacing these without vendor compatibility checks leads to degraded performance or loss of functionality.
Typical partitions and blobs to be aware of: sbl1, aboot/abl, rpm, tz, hyp, dsp/adsp, modem/NON-HLOS.bin, efs, boot, vendor_boot, dtbo, vbmeta, and vendor-specific names (Qualcomm vs MediaTek: sbl1/preloader, lk). Never overwrite EFS; back it up with platform tools or by dd (for example: adb shell su -c “dd if=/dev/block/by-name/efs of=/sdcard/efs.img” && adb pull /sdcard/efs.img) or vendor backup utilities.
Commands to inspect low-level versions and lock state: check Settings → About phone for baseband and bootloader strings; via command line use adb shell getprop gsm.version.baseband and adb shell getprop ro.bootloader; use fastboot getvar all or fastboot oem device-info to read bootloader lock status and partition info. Review dmesg/logcat for firmware-load messages when drivers initialize.
Risks and compatibility rules: match firmware to exact model and carrier region; mixing images across models or SoC revisions often breaks radios, IMEI/EFS or encryption. Unlocking the bootloader typically wipes keymaster/TEE data and disables verified-boot protections; re-locking without restoring vendor-signed images may leave the device non-bootable.
Practical checklist before any low-level change: 1) record current bootloader/baseband/dsp versions; 2) back up EFS and userdata; 3) obtain vendor-signed images for the exact SKU and carrier; 4) verify image signatures (AVB/vbmeta where present); 5) apply changes using vendor tooling or documented fastboot/adb procedures; 6) validate cellular, Wi‑Fi, camera and charging behavior immediately after the operation; 7) re-lock bootloader if security needs to be restored.
If you cherished this report and you would like to receive a lot more information pertaining to 1xbet promo code philippines kindly take a look at the web site.
- Scope and responsibility
Samsung A10s Android Version – Which Android Does It Run?
Factory software: the device shipped with mobile OS release 9 (Pie) in 2019 and received an official upgrade to release 10 with the vendor’s One UI 2 skin. The manufacturer did not provide an official upgrade to release 11, so the last vendor-sanctioned major release is 10.
Hardware constraints: the unit uses a MediaTek Helio P22 (MT6762) platform with typically 2–3 GB RAM, ~32 GB internal storage and a 4000 mAh battery. Those specifications limit headroom for newer major releases and mean custom releases may be the only way to move beyond the vendor-supported software while accepting slower performance or feature gaps.

Actionable options: stay on the official release 10 and install vendor updates to preserve stability and security; choose a community firmware (for example LineageOS builds where available) only if you can unlock the bootloader, flash a custom recovery, and accept warranty loss plus possible missing vendor features (camera tuning, modem/RIL, biometric support). Always create a full backup and verify the exact model codename before flashing.
How to check and update: go to Settings → About phone → Software information to view the current mobile OS release and security patch level, and use Settings → Software update for official patches. If you require a newer major release for specific apps, compare app minimum requirements against the device’s RAM and processor before attempting unofficial upgrades.
Release software snapshot
Verify your handset’s current build in Settings → About phone → Software information before any firmware action; record the Build number and Security patch level.
- Launch firmware: shipped with OS 9 (Pie) with the manufacturer’s lightweight UI core; base build tags commonly start with PPR1.180610.011.
- Major upgrade history: received one official platform upgrade to OS 10 (One UI 2.x) via staged OTA–availability varies by market and carrier, so confirm on your device support page.
- Security patch delivery: started as monthly, later reduced to quarterly for low-end SKUs; the last official patch date differs by region–check Security patch level in Software information.
- Build string anatomy: example pattern = BaseTag.Bundle.Patch.BuildID.Region (example: PPR1.180610.011.XXXXXX); patch level uses YYYY-MM-DD format.
- Firmware matching rules:
- Only use packages that match the exact model code and CSC/region.
- A mismatched package can break modem functionality or cause bootloops.
- Prefer signed stock packages from the device maker’s support portal over third-party-modified images.
- Safe update methods:
- OTA via Settings → Software update – simplest, preserves data and carrier settings.
- Manufacturer’s PC tool or official support site for reinstallation or when OTA fails.
- Manual flashing only if you can confirm model, region and build; use official archives and follow exact flashing steps.
- Pre-update checklist:
- Create a full backup (app data, photos, messages).
- Charge battery to at least 50% and ensure a stable USB connection for PC installs.
- Record Model number, Build number and CSC/region string before flashing.
- Disable OEM unlock only if you plan custom ROMs; leaving FRP active protects against unauthorized flashes.
- Quick recovery steps:
- If device boots slowly or loops after update: boot to recovery and wipe cache partition first.
- If issues persist: re-flash matching stock firmware or use the manufacturer’s recovery tool.
- For lost network/VoLTE: reapply correct CSC package or contact carrier support with your model and build info.
Android version at market launch
Recommendation: expect the handset to have shipped with the 9.0 (Pie) mobile operating system paired with One UI Core; initial units rolled out in August 2019 with Pie-era security patches.
Verify on-device: open Settings → About phone → Software information and confirm the OS release number shows 9.0 (Pie), note the One UI/Core build identifier and the security patch date. Typical Pie build strings begin with PPR1 (e. If you cherished this posting and you would like to get much more info regarding 1xbet free promo code kindly pay a visit to our own internet site. g., PPR1.180610.011) but exact suffixes vary by region and carrier.
For used purchases: require a factory reset, ask the seller to show the Software information screen, and insist on stock firmware (no custom recoveries or root). If the handset does not match the 9.0 (Pie) shipping baseline or shows unlocked bootloader/custom ROM markers, request restoration to official firmware before completing the transaction.
Post-purchase action: immediately run Settings → Software update to fetch any official upgrades or security patches released after launch; if the device cannot update normally, use the manufacturer’s official desktop utility to restore the stock image.
Current Android Version – What’s the Latest Android Version Now?
Quick recommendation: Update devices that support release 14 (API 34) to receive security fixes, privacy enhancements, and UI refinements.
Release details: Official stable rollout began October 4, 2023. If you have any thoughts about where and how to use 1xbet free money, you can get in touch with us at our website. Build targets API level 34. Major changes include per-app language preferences, expanded lockscreen widgets and customization, stricter background permission rules, optimized memory handling for large displays, improved accessibility magnification and font scaling, and stronger passkey support for passwordless sign-ins.
Security and maintenance: Monthly security patches continue; vendors distribute updates on staggered schedules. For fastest delivery choose a Pixel device or carrier-unlocked handset with active vendor support.
How to prepare: Create a full backup via cloud or local image; charge battery above 50%; connect to stable Wi‑Fi; free at least 3 GB storage; review app compatibility notes from app developers before applying update.
If update isn’t available: Check OEM support pages, enroll in official beta or security programs only from trusted vendors, or consider switching to a handset with longer update commitment.
Action now: Prioritize devices that handle sensitive data for immediate upgrade; postpone update on mission-critical hardware until app and vendor compatibility are verified.
Check Your Device’s Android Version
Verify OS release and security patch monthly: open Settings > About phone > Software information.
Locate OS release number (example: 13, 12), API level, Build ID and Security patch level under Software information.
Samsung path: Settings > About phone > Software information. Pixel / OnePlus / Xiaomi path: Settings > System > About phone.
Record Build ID and Security patch date before installing updates; back up user data via Settings > System > Backup or vendor cloud.
When an update appears: use Wi‑Fi, charge battery above 50%, connect device to power, allow install to complete without interruption.
For deeper inspection, install a device‑info utility such as “CPU‑Z” or “Device Info HW” from Play Store; open app and check OS release, API level, Build ID and Security patch fields.
If updates are missing from Settings, search vendor support pages with device model and Build ID to find matching OTA or factory image; apply only files meant for exact model/build.
Open Settings and locate About phone
Open Settings and tap About phone (or About device) to view OS release, build number, security patch level, kernel information and update status.
-
Open Settings: tap the gear icon from the app drawer or pull down Quick Settings and tap the gear.
-
Use the built-in search: type “About” to jump directly to the correct screen if the menu is deep.
-
Common menu paths (select the matching UI):
- Stock/Pixel-style: Settings > System > About phone.
- Samsung One UI: Settings > About phone > Software information.
- MIUI (Xiaomi/Redmi): Settings > About phone > All specs or MIUI version / OS release.
- OxygenOS (OnePlus): Settings > About phone > Version information.
- EMUI (Huawei): Settings > About phone > Software information.
-
If labels differ, look for “About”, “Software information”, “All specs” or “Device info”. Older skins may list About under General or System.
-
To reveal build number for developer options: tap Build number seven times on the About screen (watch for a countdown toast).
Quick checklist – copy or note these fields from About phone:
- OS release (named “OS release”, “OS build” or similar)
- Build number
- Security patch level
- Kernel version
- Baseband/modem or firmware version
- Model number and IMEI (if needed)
-
15 Best Little-Known Android Apps — Hidden Gems You Need to Try
This collection highlights 15 under-the-radar mobile utilities for Google’s smartphone platform across productivity, privacy, media and automation. For those who have any kind of concerns about where by along with the best way to employ 1xbet ph app, you can email us in our web-page. Each entry in the main list includes: install size (MB), last update date, visible permissions, price model (free / freemium / one-time), and a concise one-line use case so readers can pick the right tool for a specific task.
Selection criteria: active maintenance (last update within 12 months), user rating ≥ 4.0 when available, realistic install footprint (preferably <50 MB), minimal access to sensitive permissions (avoid SMS/call access unless clearly justified), and clear data storage policies (local-only or documented cloud processing). Items flagged open-source include a direct repo link where possible.
Quick practical checks before installing: verify the permission list in the store listing, inspect battery usage in system settings after 24 hours, confirm whether backup/export exists, and test any automation rules in a sandbox profile. For network-blocking or VPN-based privacy tools prefer solutions that use a local VPN tunnel without routing traffic through third-party servers; expected CPU impact should remain low (<5% under light load).
The following entries are organized to show immediate value: one-line recommendation, concrete metrics (size, permissions, battery behavior), and the ideal scenario for deployment (offline task management, lightweight media processing, on-device encryption, or automation). Scroll down to find the item that matches a specific workflow and the exact installation footprint for planning storage and data usage.
Offline Notes: Lightweight Markdown Editor
Recommendation: Markor – offline-first, minimal Markdown editor with file-based storage, small footprint (<10 MB), open-source and usable without any network permissions.
- Core capabilities
- Local files: edit .md, .markdown, .txt and todo.txt directly in a chosen folder (internal storage or SD card).
- Live preview and split view: simultaneous editing and rendered output for faster formatting checks.
- Task lists: standard GitHub-style checkboxes (- [ ] / – [x]) with quick toggle support.
- Export & share: HTML export and share-to-print; open notes from any file manager or file mount.
- Small resource use: runs smoothly on low-RAM handsets, negligible battery impact when idle.
- Quick setup (3 minutes)
- Create a dedicated folder (suggestion: Documents/Notes).
- Open Settings → Files → Default directory → select Documents/Notes (permits SD access if needed).
- Settings → Editor → Autosave interval → set 3–10 seconds for fault-tolerant editing.
- Enable Split view in Settings → Viewer for on-device preview while typing.
- Practical templates and snippets
- Meeting note template:
– Date: 2026-03-16
– Attendees:
– Agenda:
– Action items: - Project header (YAML front matter):
—
title: Project X
tags: [project, backlog]
created: 2026-03-16
— - Quick task pattern:
– [ ] Task description @due(2026-03-20) #project
- Meeting note template:
- Search, organization and backups
- Use hashtags (#project, #meeting) and simple filenames (YYYY-MM-DD-meeting.md) for fast filtering with the built-in search.
- Periodic backup: copy the Notes folder to external storage or a mounted WebDAV/Nextcloud folder; an exported ZIP of the folder is handy for periodic snapshots.
- For sensitive content, place the notes folder inside a vault from a file-encryption tool (e.g., Cryptomator) or rely on system-level file encryption.
- Keyboard and workflow tips
- External keyboard shortcuts work: Ctrl+B (bold), Ctrl+I (italic), Ctrl+K (link) for faster composition.
- Create a small set of personal snippets (common headers, signatures) and paste them from the clipboard manager to save repeated typing.
- Use code fences for snippets:
bash
git status
- When to pick this tool
- Prefer Markor when offline-only access, tiny install size and file portability are priorities.
- Consider a sync-capable alternative if encrypted cloud sync and multi-device automatic syncing are required.
Quick start: create a note and sync later
Create a new note, set its sync mode to “Manual” (or mark as local-only), add a UTC timestamp to the filename like 20260316-1430-meeting.md, then save to the local vault or folder. That guarantees a single-file record that can be synced later with no immediate network activity.
Use plain Markdown (.md) or .txt for maximum searchability and smallest file size; keep individual notes under 200 KB for fast uploads. For metadata, include a small YAML frontmatter:
—
created: 2026-03-16T14:30:00Z
modified: 2026-03-16T14:30:00Z
tags: [project-alpha, inbox]
sync: manual
—
Store inline images in a subfolder (attachments/) and reference them with relative paths: . Resize photos to ~1000 px on the long edge and compress to 300–800 KB before attaching to avoid long sync queues. If a rich capture is required, attach a PDF under 10–20 MB; larger binaries delay subsequent syncs.
When offline editing may collide, enable the app’s conflict policy that creates a conflict copy with timestamp and device name, e.g. meeting-notes-conflict-20260316-1530.md. Resolve by opening both files and using a three-way text merge or copy-paste; preserve the earlier file’s created timestamp in the frontmatter where possible.
Recommended sync settings for deferred uploading: set network to “Wi‑Fi only”, enable “Sync on demand” or “Manual sync” and schedule background attempts at 15–30 minute intervals when charging. If background sync is desired, whitelist the note application in the system battery optimizer to prevent kills during long uploads.
Choose a remote host that matches the privacy model: Nextcloud or WebDAV for self-hosting and folder-level control; Dropbox for reliable delta sync; Google Drive for wide availability. For end-to-end encryption, enable the app’s built-in encryption or use a zero‑knowledge provider; keep the encryption passphrase backed up in a separate password manager–losing it means irretrievable notes.
Batch sync process: group related files into one folder, run a manual “Sync now” when on trusted Wi‑Fi, confirm sync log shows successful PUT/UPLOAD for each file, then check timestamps and frontmatter “modified” values. If transfers fail, retry with exponential backoff (15s, 30s, 60s) or switch to manual export of changed files via the share/export feature.
For quick captures from other applications, use the system share sheet to append content to an existing file or create a new note named with a fast prefix like INBOX-20260316.md. Keep inbox files short; triage them into project folders during the next sync session to maintain a clean folder structure: /notes/2026/03/, /projects/project-alpha/.
- Core capabilities
Best Android Games That Support Gamepads — Top Gamepad-Compatible Titles

Immediate recommendation: Choose an 8BitDo Pro 2 or Xbox Wireless Controller paired via Bluetooth for the widest device compatibility; opt for Razer Kishi wired over USB-C when minimal input lag is the priority. Pairing details: set 8BitDo to X-input mode, update firmware to v3.2+ before first use, prefer USB-C for sub-30 ms responsiveness, and use Bluetooth HID profiles on phones when a cable is unavailable.
Concrete examples and optimal settings: GRID Autosport delivers native controller mapping and stable 60 fps on Snapdragon 855+ hardware; set graphics to High and steering deadzone to ~6%. Minecraft Bedrock Edition exposes a full controller layout under Controls → Controller; lower camera sensitivity to ~40% for precise aiming. Dead Cells accepts external controllers natively; disable touch overlays, map dodge to B and heavy attack to RT for responsive combat.

Streaming and emulator workflows: Stream PC content with Steam Link or Moonlight while keeping controller bindings intact; enable the app’s low-latency mode and use a wired host or 5 GHz Wi‑Fi for consistent frame delivery. RetroArch, Dolphin and PPSSPP accept controllers via SDL/native drivers–set the input driver to “joypad,” calibrate analog axes, and save per-core profiles to retain deadzones and button maps.
Practical tips and precautions: Use mapping apps like Octopus or Mantis only when native layouts are missing, test profiles offline, and avoid granting more permissions than required. Update controller firmware, turn off aggressive power-saving on the device, and prefer wired connections for competitive play. For multiplayer matchmaking, verify controller input is allowed by the app before entering ranked sessions to prevent automatic bans or input mismatches.
Racing Games Optimized for Gamepads
Use GRID Autosport with a wired Xbox Series controller via USB-C OTG for the lowest input lag and the most accurate analog steering – set Steering Sensitivity to ~45%, Deadzone 4–6%, Vibration medium, Analog Triggers for throttle/brake, and Frame Limit unlocked where device can sustain 60+ FPS.
For sim-style ports such as Real Racing 3 and GRID: pair a DualShock 4 or 8BitDo Pro 2 over Bluetooth LE if wired connection is impractical; set Steering Sensitivity 35–45%, Deadzone 5–8% (raise if oscillation occurs), Steering Linear response ON for predictable inputs, Traction Control medium, ABS on for consistent braking, and map Brake to LT/L2 and Throttle to RT/R2.
For arcade racers like Beach Buggy Racing 2 and Sonic & All‑Stars Racing Transformed: prefer a clamp-style wired controller (Razer Kishi or similar) to minimize latency; set Steering Sensitivity 60–75%, Deadzone 2–4% for snappy steering, use Auto-Accelerate where available for casual play, and map Nitro/powerups to shoulder buttons for instant access.
Controller hardware recommendations: Xbox Series X|S controller (Bluetooth or wired) for best analog feel and wide compatibility; DualShock 4 for broad Bluetooth mapping; DualSense usable but haptic features are limited on many ports; 8BitDo Pro 2 for programmable deadzones and custom profiles; Razer Kishi V2 for near-zero latency via USB-C clamp; GameSir T4 Pro for mobile-focused mapping utilities.
Connection and latency tips: wired USB-C OTG typically yields ~3–8 ms input latency, Bluetooth LE ~15–40 ms depending on phone and controller, Classic Bluetooth can be 40–80 ms. To reduce perceived lag, enable device high-performance mode, use the highest stable refresh rate the app offers (90–120 Hz if supported), close background processes, and update controller firmware. Disable Bluetooth audio during play to lower radio congestion.
Control-mapping suggestions: Throttle → RT/R2, Brake → LT/L2, Handbrake → RB/R1 (or a face button for quick taps), Camera → RS click, Look-around → right stick. For drifting setups reduce Steering Sensitivity to 25–35% and increase Deadzone slightly to avoid twitching. If understeer/oversteer feels excessive, decrease steering non-linearity or enable progressive steering curves when available.
Peripherals and advanced setups: many ports accept USB wheels via OTG and powered USB hubs (check individual app device lists); direct USB connection often enables force feedback on supported ports. When you have just about any queries with regards to where in addition to how you can work with 1xbet sign up, you’ll be able to call us on our own web-site. For titles without native controller recognition, use input-mapping utilities (e.g., Octopus-style mappers) as a fallback, keeping in mind added mapping layers can introduce 10–30 ms extra latency.
GRID Autosport – controller setup and sensitivity
Set Steering Sensitivity to 45% and Steering Deadzone to 6% as a reliable baseline for controllers with average sticks; adjust from there by car class (lower for high-grip touring, higher for lightweight open-wheel).
- Button/axis mapping (recommended):
- Left stick – steering
- Right trigger – throttle; Left trigger – brake
- A / Cross – handbrake
- X / Square – gear down; B / Circle – gear up (if manual)
- RB / R1 and LB / L1 – shift paddles or brake-bias adjustments
- Start / Options – pause/menu
- Deadzone targets:
- Steering deadzone: 4–8% (4% for new hardware, 8% if stick has drift)
- Throttle deadzone: 1–3%
- Brake deadzone: 2–5%
- Sensitivity and response curve:
- If available, set steering response/linearity to near-linear for predictable mid-corner behavior (recommended value ~0.8–0.9).
- For more aggressive turn-in, increase steering sensitivity by +10–15%; for smoother control on entry, decrease by −10%.
- Assist and traction settings (controller-specific tuning):
- ABS: level 1–2 for stability under braking without flattening brake modulation.
- Traction Control: level 1–2 for lower wheelspin with conservative throttle input.
- Disable steering aids if you want direct stick-to-steer feel; enable them one notch if the car snaps in first laps.
- Vibration and latency:
- Turn vibration off to reduce perceived input lag for competitive sessions; enable for casual play.
- Use wired connection (USB-C/OTG) when possible to cut Bluetooth jitter on supported controllers.
- Calibration and testing routine:
- Pair and confirm controller in device settings, then open GRID Autosport controller page and clear old bindings.
- Assign axes and buttons, then run a straight-line test: hold full lock left/right to confirm range and center returns precisely.
- Do three hot laps on a familiar circuit:
- Lap 1: baseline values (45% sensitivity, 6% deadzone)
- Lap 2: +10% sensitivity – watch for oversteer on turn-in
- Lap 3: −10% sensitivity from baseline – watch for understeer and sluggish response
- Choose the setting that yields smallest steering corrections and consistent lap time variance.
- Controller-specific notes:
- Xbox and DualSense controllers work reliably via Bluetooth; confirm firmware is current.
- Third-party controllers with large hardware deadzones need higher steering sensitivity but also larger deadzones; start with deadzone = hardware drift + 2%.
- If using a controller with triggers mapped as buttons, remap to analog axis for brake modulation; otherwise braking will be binary and hard to control.
If lap times swing more than 0.5–0.8s after a single input change, revert toward the previous setting and fine-tune in 2–3% increments until steering corrections and throttle modulation feel consistent across car classes.

- Button/axis mapping (recommended):
Poco X3 Pro Android Version – Which Android OS Does It Run?
Recommendation: Keep the phone on the latest MIUI release you can install from official channels (MIUI 12.5 Enhanced or MIUI 13 builds) because those packages preserve stability and vendor drivers while delivering security patches; if you require a newer underlying Google mobile operating system major release, prepare to move to a community-maintained ROM after validating hardware support.
Factory state: the model shipped with MIUI 12 on an AOSP-based Google mobile OS 11 core. Official updates delivered MIUI 12.5 (Enhanced) and later MIUI 13 packages, but those updates retained the same underlying OS 11 base rather than advancing the major Google platform level. Check Settings → About phone → MIUI version and Security patch level to confirm which build and patch date your unit currently runs.
If you want more recent platform features or an upgraded major Google mobile OS base (12 or 13), practical options are: 1) choose a maintained aftermarket build such as LineageOS or Pixel Experience that explicitly lists support for this device and the target platform; 2) unlock the bootloader, make a full TWRP (or equivalent) backup, and test ROMs on a secondary device or after a full NANDroid backup; 3) verify modem, camera and Widevine status post-flash – Camera HAL and DRM often break on unofficial builds.
Security and daily use guidance: install official MIUI OTAs when available, apply monthly or quarterly security packages listed in Settings, and avoid random unsigned firmware packages. If you opt for a custom release, prefer actively maintained forks with recent security commits and a clear changelog; otherwise keep the official MIUI 13 build for the best balance of performance, camera reliability and carrier compatibility.
Current Android Version on the Poco X3 Pro
Recommendation: Open Settings → About phone → Software information and install the latest stable MIUI OTA available; the handset originally shipped with MIUI 12 on OS 11 (API 30) and received the official MIUI 13 upgrade based on OS 12 (API 31).
To verify the exact build and patch level: go to Settings → About phone → Software information and note the MIUI version string, OS release (numeric level) and Security patch level date. Use the built‑in Updater app for official over‑the‑air packages; save a full backup before applying manual packages or fastboot images.
If you require a newer major OS level than provided by the manufacturer, check community ROMs (LineageOS, crDroid and active XDA threads) for maintained builds targeting OS 13 or later; confirm device codename support, active maintainer, known issues and required recovery/bootloader steps. Unlocking the bootloader and flashing custom firmware voids warranty and carries risk of data loss.
For security cadence: prefer official OTAs for monthly/quarterly security fixes; compare the Security patch level in Software information with the device support page to determine whether an update is pending or already applied.
Identify Android OS and MIUI base in Settings
Open Settings → About phone and read the “OS version” and “MIUI version” lines; if unclear, verify with the commands shown below.
-
Quick check in Settings:
- Settings → About phone → OS version – displays the underlying OS release (example: 11).
- Settings → About phone → MIUI version – shows MIUI release string (example: MIUI 12.5.6.0 RKHMIXM) and often the ROM branch (Global / China / EEA / IN).
- Settings → About phone → Security patch level – shows latest security update date (example: 2024-02-05).
- Settings → System update → Update details – release notes frequently state the exact OS base used for that MIUI build.
-
Interpret MIUI string:
- MIUI number at the start = MIUI release (e.g., 12.5, 13).
- Parentheses or trailing code usually contain device codename + region tag (look for EU, IN, GLOBAL, CN, etc.) to determine ROM channel.
- Build ID and incremental fields identify incremental firmware and can be matched to Xiaomi/third-party changelogs.
-
Verify with a USB connection (fast, exact):
- Run adb shell getprop ro.build.version.release – returns the OS release number (example output: 11).
- Run adb shell getprop ro.miui.ui. If you have any queries regarding in which and how to use 1xbet promo code for registration, you can get in touch with us at our own internet site. version.name – returns MIUI name (example output: V12.5).
- Run adb shell getprop ro.build.version.incremental – returns build identifier.
- Run adb shell getprop ro.build.version.security_patch – returns security patch date.
-
If Settings and adb disagree:
- Check for a custom ROM or unlocked bootloader (Settings → Additional settings → Developer options → Build number) and compare build fingerprint via adb shell getprop ro.build.fingerprint.
- Cross-check MIUI update server pages or the official updater app changelog using the exact MIUI build string to confirm the OS base claimed by the firmware.
-
Practical checklist to copy or screenshot:
- Take a screenshot of About phone showing OS version, MIUI version and Security patch.
- Record adb outputs for ro.build.version.release, ro.miui.ui.version.name and ro.build.version.security_patch.
- Match MIUI build string against official release notes to determine exact OS base and ROM channel.
-