Can Android TV Use a Regular Antenna? OTA Setup & Tips
Recommendation: Most streaming boxes that lack an internal RF tuner will accept live terrestrial channels when paired with a compatible external tuner and an aerial; prefer a networked tuner (e.g., HDHomeRun) for simultaneous viewing on multiple devices, or a plug‑in USB tuner for single‑box use. Opt for a rooftop aerial when signal strength measures under 60% or when over ~15 miles (24 km) from the nearest transmitter.
Frequency ranges and connectors: North American broadcasts follow VHF‑Low 54–88 MHz (channels 2–6), VHF‑High 174–216 MHz (7–13) and UHF roughly 470–608 MHz (post‑repack channels up to 36); F‑type coax is standard. Europe commonly uses DVB‑T/T2 on UHF bands (roughly 470–790 MHz) with IEC coax connectors. Match the aerial and cable type to local connector standards before buying hardware.
Tuner choices and client software: Options include USB tuners (Hauppauge, generic RTL‑SDR dongles), network tuners (SiliconDust HDHomeRun) and standalone tuner boxes that output HDMI or stream over Ethernet. Client applications that work with many boxes include HDHomeRun View, Plex DVR, TVHeadend front‑ends and Kodi PVR add‑ons. Verify driver and application compatibility with your device firmware prior to purchase.
Signal guidance: Use a directional UHF aerial for distant transmitters and a wideband indoor aerial for strong local signals. Add a low‑noise amplifier only when long cable runs or measured signal levels justify it; avoid amplification if signals overload the tuner (symptoms: ghosting, blocked channels). For multi‑unit dwellings, a single roof aerial with a distribution amplifier or a central network tuner is usually more reliable than several separate indoor aerials.
Quick checklist before buying: confirm the regional broadcast standard (ATSC 1. Should you have any kind of queries with regards to wherever along with how to use 1xbet app download apk, it is possible to e mail us at our own page. 0/3.0, DVB‑T/T2, ISDB‑T), check for built‑in tuner presence, verify connector type (F‑type vs IEC), choose USB vs network tuner based on how many devices will view/record simultaneously, and ensure your preferred client app supports the chosen tuner model and firmware.
Antenna compatibility with Android TV tuners
Match the tuner’s broadcast standard and input: choose a 75‑ohm F‑type outdoor UHF/VHF aerial for tuners labeled ATSC 1.0, ATSC 3.0, DVB‑T/T2 or ISDB‑T; for devices sold in Europe verify IEC male/female fit or plan to add a simple F↔IEC adapter.
Frequency ranges to check before buying an aerial: VHF low (54–88 MHz, channels 2–6), VHF high (174–216 MHz, channels 7–13), UHF (470–698 MHz for most markets after recent re‑packing). Pick an antenna covering both VHF and UHF if any VHF channels are listed by local broadcasters.
Cable and impedance: the tuner expects 75‑ohm coax. Preferred coax for runs under 30 m is RG‑6 foam; for longer runs pick low‑loss coax (RG‑11 or LMR‑400). Typical attenuation at ~600–700 MHz: RG‑6 ≈ 6–8 dB per 100 m, RG‑11 ≈ 3–5 dB per 100 m; add a mast amplifier or change coax if measured loss reduces carrier below receiver sensitivity.
Amplification and power: install a mast‑mounted preamplifier with gain 12–18 dB and noise figure ≤1.0 dB when signals are weak. If signals measure strong (above about ‑50 dBm), insert an inline attenuator (6–12 dB) to prevent overload or intermodulation. Verify whether the tuner provides DC power on the coax (commonly 5 V) before applying power to an active aerial; if the tuner does not supply power, select an amplifier with its own power injector.
Connectors and legacy wiring: do not connect 300‑ohm twin‑lead directly to a 75‑ohm input; add a 300→75 balun. Splitting a feed without an amplifier introduces loss (two‑way ≈ 3.5 dB, three‑way ≈ 7 dB); prefer a powered distribution amplifier for multiple receivers.
Signal targets and polarization: aim for signal levels in the approximate range of ‑80 to ‑60 dBm at the tuner for robust reception of digital multiplexes; if reception is intermittent, adjust antenna azimuth and polarization (many UHF services are horizontally polarized, but some broadcasters use vertical). Use a directional Yagi or log‑periodic when stations cluster in one direction; choose a multidirectional or omnidirectional element when stations are spread around.
External USB tuner dongles and driver support: confirm firmware supports the exact tuner model and broadcast standard before buying a USB stick; many set‑top boxes accept DVB‑T/T2 or ATSC USB modules only if drivers are included in the firmware. Check vendor documentation or community forums for verified models.
Installation safety and grounding: mount outdoor aerials on a grounded mast with a coax grounding block bonded to building earth. For coastal or industrial environments, select corrosion‑resistant fittings and sealed weatherproof connectors to maintain low return loss over time.
Quick checklist before purchasing: identify broadcast standard(s), confirm tuner connector and impedance, measure approximate distance to transmitters and expected run length, choose coax to keep loss below ~6–8 dB at operating frequencies, decide on mast amplifier only after confirming tuner power and expected signal level.
Check if your Android TV has a built-in tuner (ATSC/DVB)
Inspect the TV chassis for an ANT IN (75Ω) RF coax connector; if present, run an Auto-tune or Channel Scan in Settings – discovery of channels confirms a native ATSC or DVB tuner.
- Locate model information: sticker on the back, bottom edge, or inside the menu at Settings > About (model number, firmware/date code).
- Physical indicators to check:
- RF connector labeled “ANT IN”, “RF”, “75Ω” or “ANT/CABLE”.
- Printed spec lines on the rear label mentioning “ATSC”, “ATSC 3.0”, “DVB-T2”, “DVB-C”, “DVB-S2”, or “ISDB-T”.
- Menu test:
- Settings → Channels or Inputs → select RF/ANT/Cable input → Auto Program / Channel Scan.
- If scanning returns channel lists and signal strength bars, the tuner is active and supports the broadcast standard detected.
- Web verification:
- Search the exact model code plus keywords: “ATSC”, “ATSC 3.0”, “DVB-T2”, “DVB-C”, “DVB-S2” (example query: “MODEL1234 specs ATSC”).
- For US models use the FCC ID (sticker), then check fccid.io for internal tuner modules and filings that list supported standards.
- Regional mapping (quick reference):
- North America: ATSC 1.0; newer sets may list ATSC 3.0 / “NextGen TV”.
- Europe/UK/Australia: DVB-T / DVB-T2 (UK and many EU models include DVB-T2).
- Japan: ISDB-T variants.
- Satellite/cable variants labeled DVB-S/DVB-S2 or DVB-C respectively.
- When the spec sheet omits tuner details:
- Note region SKU suffixes (EU, US, UK) on the model code – tuner availability often differs by SKU.
- Contact manufacturer support with model number, firmware version and purchase country for a definitive answer.
- If no internal tuner is present or it is disabled:
- Use an external receiver box or a networked tuner box (e.g., Intel/SiliconDust-style devices) that supplies channels over HDMI or LAN.
- USB tuner sticks frequently require driver support; verify compatibility with the TV OS before purchase.
- Check rear/side for ANT IN (75Ω) RF port.
- Run Settings → Channels → Auto-tune / Channel Scan.
- Note model/firmware, then search ” ATSC” or ” DVB-T2″ and check manufacturer specs or FCC filings.
- Contact support with model, firmware and country if tuner presence or standard remains unclear.
Why Does Your Android Phone Suddenly Turn Off? Causes & Quick Fixes
Immediate action: check battery health in Settings → Battery (replace if maximum capacity reads ≤ 80% or status is “Poor”); connect a known-good charger and run adb shell dumpsys battery to verify level, health and temperature; if the device powers down again, boot into safe mode to isolate third-party apps and back up critical data before further steps.
Hardware causes dominate: degraded cells with high internal resistance produce voltage collapse under peak load, leading to abrupt power loss. Replace the cell when capacity falls below ~80% of original. Thermal thresholds: SoC throttling typically starts near 45–55°C, while critical shutdowns occur around 85–95°C; battery management will refuse to charge or will cut output outside roughly -10–60°C. Use a USB power meter to confirm charger output (normal 5.0V; fast-charge profiles 9–12V depending on protocol) and observe charge current – sustained currents <500mA usually indicate a bad cable, adapter or port.
Software/firmware faults can cause kernel panics or watchdog-triggered reboots. Capture logs with adb logcat -d and search for “FATAL EXCEPTION”, “kernel panic” or repeated reboot timestamps; generate adb bugreport when possible. Recommended sequence: update system and apps, uninstall recently added apps, clear app caches, boot to recovery and wipe cache partition, then retest. Reserve factory reset until after a full data backup if all else fails.
Practical checklist: 1) remove case and stress-test to detect overheating; 2) boot in safe mode to rule out rogue apps; 3) swap charger/cable and measure charging current; 4) inspect battery for swelling and connectors for corrosion; 5) verify power-button function and moisture indicators; 6) reseat removable batteries; 7) for sealed units, arrange professional battery replacement or board-level diagnostics. If logs show repeated thermal spikes or kernel faults, stop regular use and seek service to avoid data loss or hazard.
Immediate checks to perform right after shutdown
Force a restart: press and hold the power key + volume down for 10–15 seconds; if no response, continue up to 30 seconds, release for 10 seconds, then try again.
-
Charger and cable test
- Use the original charger or a known-good charger. Typical outputs: 5V/1A, 5V/2A, 9V/2A (USB‑PD/QC).
- Swap cables and wall adapters–cheap/old cables often fail. If available, measure current with a USB power meter; expected charging current when powered-down should usually exceed 100 mA. Values under 50–100 mA indicate a bad cable/charger or port fault.
- Try a different outlet and a different USB port on a desktop/laptop (some laptop ports supply limited current when sleeping).
-
Visual and tactile inspection
- Remove case and inspect charging port for lint, corrosion or bent pins; clear debris with compressed air or a wooden toothpick–do not insert metal tools.
- Check for battery swelling: separation of the back cover, bulge, or a pop in the case. If the battery appears swollen, stop charging and arrange a battery replacement; avoid puncturing.
- Look for liquid damage in the SIM tray or under removable covers: a red or pink Liquid Contact Indicator (LCI) usually means exposure to moisture–do not plug into power if LCI shows contact.
-
Temperature and recent conditions
- If the unit was exposed to >45°C (in direct sun or left in a hot car) or below 0°C, allow it to cool or warm to room temperature (20–25°C) for 15–60 minutes before retrying to boot or charge.
- If the device felt very hot before shutdown, wait at least 30 minutes; then try charging with a low-wattage charger (5V/1A) for 10–15 minutes and observe any warm-up or LED activity.
-
Button and connector checks
- Ensure the power button and volume keys are not stuck. Press each several times–sticky buttons can prevent startups or trigger repeated shutdown behavior.
- Test wireless charging (if supported) with a known-good pad; successful wireless charge LED/animation indicates internal power circuitry is alive even if the display remains dark.
-
Boot-path diagnostics
- Attempt recovery/bootloader: press and hold power + volume up (or power + volume down on some models) for 10–20 seconds. Different manufacturers use different combos–if unsure, try both variants once each with a 30-second pause between attempts.
- Connect to a PC via USB and watch Device Manager (Windows) or System Information (macOS). If the handset enumerates as a USB device, try “adb devices” or “fastboot devices” only if familiar; recognition indicates the bootloader or OS has partial functionality.
-
Short-term data preservation
- If the unit becomes responsive briefly, immediately back up critical data (photos, contacts, messages) to cloud storage or via USB to a computer before further troubleshooting.
-
When to stop and seek professional help
- Do not attempt battery replacement or board-level repair at home unless trained. If none of the above produce signs of life (LED, vibration, USB enumeration) after 30–60 minutes of tests, note serial/IMEI and take the handset to an authorized service center.
- Document the sequence of events (battery level prior to shutdown, temperature, recent impacts or liquid exposure) to speed up diagnostics at the repair shop.
Verify battery level and recent charge history
Record the exact last-full-charge timestamp, the percentage shown before the unexpected shutdown, and the device’s reported full-charge capacity (mAh or %).
Open Settings → Battery → Battery usage (or Battery health) and note: Last full charge time, screen-on time since full, and the top three draining apps. If the OS view is limited, run: adb shell dumpsys battery to obtain fields such as level (0–100), voltage (mV), temperature (tenths °C), status, and health. Convert temperature by dividing the dumpsys value by 10 (e.g., 320 → 32.0 °C). Voltage is already in millivolts.
Interpret values using these practical thresholds: full-charge voltage ≈ 4100–4200 mV; nominal/resting voltage ≈ 3700 mV; if full-charge voltage reads consistently below 4100 mV the cell shows aging. Maximum capacity above 80% is acceptable, 70–80% is moderate wear, under 70% indicates replacement should be considered. Typical useful cycle count before noticeable capacity loss: ~300–500 cycles.
Check for rapid percentage drops: a decline of more than 5–10 percentage points within a few minutes under light use or idle suggests voltage-reading instability or failing cells. In dumpsys batterystats, search for abrupt “discharge” entries and correlate timestamps with app activity or wakelocks.

Measure charging current and charger behavior: typical currents – USB 2.0 ≈ 500 mA, USB 3.0 ≈ 900 mA, standard wall chargers ≈ 1000–3000 mA depending on protocol. If measured charging current is less than expected by >30%, swap cable and charger, then retest. In case you loved this short article and you want to receive more details concerning 1xbet login registration generously visit our internet site. Use AccuBattery or similar to log mA, mAh charged, and estimated remaining capacity over several cycles.
If temperature during charge exceeds 45 °C or spikes to > 50 °C, stop charging and inspect the charging hardware; thermal stress shortens cell life and can trigger sudden shutdowns. For erratic voltage, low full-charge capacity, or repeated rapid drops despite using a known-good charger and cable, plan a battery replacement or professional service; preserve the recorded dumpsys and app logs to show to the technician.
-
How to Root Android – Safe Step-by-Step Guide 2026
Immediate recommendation: create a full device image with a custom recovery (for example TWRP), copy the NANDroid archive to your PC and verify integrity with SHA256 checksums before any modifications. Keep battery level above 80% and use a high-quality USB cable; interrupted flashing frequently causes permanent failure.
Enable Developer options, toggle the OEM setting that permits bootloader modification and enable USB debugging. Confirm exact model and build with adb shell getprop ro.product.model and adb shell getprop ro. If you liked this write-up and you would such as to get even more information concerning download 1xbet app kindly check out our web site. build.fingerprint. Reboot to bootloader with adb reboot bootloader and check bootloader state via fastboot oem device-info. Expect a complete data wipe when bootloader modifications are applied.
Install official platform tools (adb/fastboot) on your computer. Download the device-specific custom recovery image from the official source (twrp.me) and verify its checksum. Flash recovery with fastboot (example): fastboot flash recovery twrp-3.x.x-x-device.img. Use the recovery to flash a systemless manager ZIP (Magisk); download the matching APK for post-install management and confirm ZIP integrity before flashing.
Caveats: applying elevated-privilege modifications can void warranty, break OTA updates and trigger verified-boot protections. Keep the full backup and the stock firmware image ready for restoration. After installing the manager, verify elevated access by opening adb shell and running su -c id (or checking which su and confirming id returns uid=0). If the device fails to boot, restore the NANDroid archive from recovery or reflash stock firmware.
Prepare your device and environment
Charge the battery to at least 80% and keep the device plugged into a stable power source during all flashing steps; a mid-process shutdown will likely brick the unit.
Create three independent backups: copy DCIM/Downloads via MTP to a PC, export contacts to a .vcf and messages using a trusted SMS export app, and export any app-specific data (use the app’s built-in export or adb pull /data/data/ if you have prior root-level access). Treat a factory reset as inevitable when unlocking the bootloader.
Remove all linked accounts that trigger activation locks: Settings → Accounts → remove Google/brand account entries; verify FRP lock is cleared by booting to recovery after removing accounts.

Enable Developer options and debugging: Settings → About → tap Build number seven times; then open Developer options and toggle ON USB debugging and OEM unlocking (if present). Note: some carriers/models hide OEM unlock behind carrier locks or require a vendor unlock token.
Record device identifiers before any modification: run adb shell getprop ro.product.model, adb shell getprop ro.build.fingerprint, adb shell getprop ro.bootloader and write down Model, Variant, Baseband, Bootloader version and Build ID. Save this text file with timestamps for recovery reference.

Install official platform-tools from the vendor (Google’s package for fastboot/adb). Verify the archive checksum: on macOS/Linux use sha256sum .zip; on Windows use CertUtil -hashfile .zip SHA256. Extract to a known folder and add to PATH or run tools from that folder.
On Windows install the OEM USB driver for your brand (Google USB Driver for Pixels, Samsung Kies/Odin-drivers if required, Qualcomm/MediaTek drivers for specific chipsets). Confirm connection with adb devices and fastboot devices; if devices do not appear, try a different USB port (rear ports on desktops) and a data-capable USB cable.
Download and verify all firmware and image files specific to your exact model and build: stock factory image, stock boot/recovery images, vbmeta, and the custom recovery or tooling you plan to use. Check SHA-256 hashes for each file and keep original stock images on offline storage (external HDD or USB stick).
Prepare the PC environment: disable automatic OS updates and sleep, use an administrative account (Windows: Run as Administrator; macOS/Linux: use sudo for commands), close backup and sync apps that may interfere with USB traffic, and ensure a reliable internet connection for token requests or vendor unlock pages.
Create a written rollback plan: list exact fastboot/flash commands to restore stock images, keep vendor unlock codes and account passwords accessible, and store a copy of the stock firmware and flashing tools on a separate medium to use in case of recovery attempts.
Confirm exact device model, build number and Android version
Verify model and build before any modification: open Settings → About phone and copy Model number, Build number, Android version, Security patch level, Kernel version and Bootloader version exactly as shown.
Collect the same information via ADB so it cannot be misread: connect device and run adb shell getprop ro.product.model, adb shell getprop ro.product.device, adb shell getprop ro.build.fingerprint, adb shell getprop ro.build.version.release and adb shell getprop ro.build.version.sdk. Save output with adb shell getprop > device-props.txt.
Confirm the bootloader/vendor identifiers used by developers: check adb shell getprop ro.bootloader, adb shell getprop ro.product.board and adb shell getprop ro.build.product. Match those values against the target image or package name exactly (case-sensitive).
From fastboot mode validate hardware name and versions: use fastboot devices then fastboot getvar all (or fastboot oem device-info on some vendors). Note product, version-bootloader, version-baseband and unlocked flags.
Compare build fingerprint and incremental build ID from device with the firmware or recovery image signature posted by the maintainer or vendor. A mismatch in fingerprint, model codename or incremental ID is a common cause of bootloops and nonfunctional images.
Account for regional and carrier variants: examples – Samsung SM-G991B vs SM-G991U, Pixel 7 vs Pixel 7 Pro, OnePlus IN202x vs LE2120. If the model string differs by a single character or suffix, obtain an image that explicitly lists support for that exact model and build.
If a third-party package lists a device codename, verify the codename using adb shell getprop ro.product.device and cross-check the maintainer’s thread or repository tags. Do not rely on marketing names; use build properties and fastboot product output.
Keep these outputs as proof before flashing: attach device-props.txt and fastboot-getvar.txt to any support request. When seeking files, paste exact values for ro.build.fingerprint, ro.product.device and the bootloader string to avoid mismatched downloads.
Android TV vs Smart TV – Key Differences, Features & Which to Buy
Recommendation: for streaming throughput and app availability prioritize sets or dongles that offer hardware HEVC and AV1 decode, HDR10+ or Dolby Vision and at least 2 GB of system RAM in the OS layer. If you have any type of concerns relating to where and how you can utilize 1xbet mobile app, you can contact us at the web site. A stable 25 Mbps downstream is the practical minimum for reliable 4K HDR playback from major services.
Most Google-powered environments provide direct access to the large app store ecosystem used by major providers (Netflix, Prime Video, Disney+, Hulu, YouTube), frequent app updates and built-in casting. Vendor-made interfaces often bundle exclusive apps and home-ecosystem features (soundbar/phone pairing, branded assistants) and typically power value models with cost-focused hardware choices. Check whether the set or dongle lists AV1, HEVC, HDR10/Dolby Vision, Dolby Atmos and HDMI 2.1 capabilities before purchasing.
For gaming prioritize panel response and HDMI spec over the operating layer: low input lag (<15 ms at 60 Hz), ALLM and VRR support depend on the display chipset and HDMI implementation, not the software store. For privacy and voice control, verify account linking rules and which voice assistant handles local commands versus cloud processing; Google-based platforms usually use Google Assistant, while vendor interfaces rely on the manufacturer’s assistant or third-party integrations.
Quick buying guide: budget 43–50″ sets with vendor interfaces commonly start around $300–$450; midrange 55–65″ models with better processors and codec support fall in $500–$1,000; dedicated streaming sticks/boxes that run the Google platform cost roughly $30–$100 and can upgrade older displays. If you stream a lot of 4K HDR content, prioritize AV1 support and a recent SoC over cosmetic UI differences.
Platform Snapshot
Recommendation: choose a Google-backed set-top operating system for the widest app catalog, fastest security patch cadence and built-in casting; choose a manufacturer’s proprietary interface for simpler navigation, manufacturer-tuned picture presets and occasional bundled streaming credits.
App ecosystem & updates – Google-backed builds provide access to a large, curated store with thousands of apps adapted for large screens and regular Play Store refreshes; expect major OS updates roughly once per year and security patches monthly or quarterly for devices with active support. Vendor platforms often ship fewer third-party apps (typically a few hundred screen-optimized titles) and deliver firmware updates on a 3–6 month cadence with major OS upgrades less frequent.
Streaming formats & DRM – For guaranteed 4K HDR playback and premium streams, verify Widevine L1 or equivalent DRM certification and explicit Dolby Vision/HDR10+ listings. Devices using Google’s stack commonly expose Widevine L1 and Chromecast, but Dolby licensing depends on the manufacturer; proprietary interfaces may support AirPlay and manufacturer-specific HDR combinations–always check the spec sheet for codec and DRM levels rather than assuming support.
Voice, casting and ecosystem fit – Google-backed OS includes native Google Assistant and Chromecast built-in; expect robust search across apps and multi-room speaker linking. Vendor platforms may ship Alexa, Alexa-works-with, or custom assistants and sometimes include AirPlay or proprietary casting; choose by which smart-home ecosystem and voice assistant you already use.
Performance & peripherals – Look for at least 2–3 GB RAM and a quad-core CPU on 4K sets for snappy navigation and app multitasking. For gaming, select models advertising a low-latency Game Mode (target <20 ms at 60 Hz on a 4K panel) and HDMI 2.1 for higher refresh rates. Confirm USB, Ethernet and Bluetooth versions if you need local media playback, wired connectivity or gamepad support.
Pick guidance by use-case – If app variety, frequent security patches and casting are priority: pick a Google-backed device. If you prefer a simplified interface, manufacturer picture profiles, or bundled services/discounts: pick the vendor-specific build. For hybrid needs, prioritize the device with the required DRM codecs, the lowest input lag for gaming, and an announced update window from the maker.
OS origin and licensing
Choose sets that ship with a certified Google services bundle plus Widevine L1, or a well-supported vendor OS that publishes a firm update and DRM policy.
- Source model: Two dominant approaches exist – a Google-maintained open-source upstream used by many manufacturers, and wholly proprietary vendor platforms (examples: Tizen, webOS, Roku OS, Amazon’s Fire OS). The former grants broad app compatibility when paired with Google services; the latter relies on vendor-controlled app stores and SDKs.
- App-store access: Inclusion of Google Play and Google apps requires a licensing agreement and device certification. Devices that omit that bundle can still run major streaming apps only if those providers explicitly support the vendor platform or offer their own store builds.
- DRM commitments: High-resolution streams typically require platform DRM certifications. Look for Widevine L1 and/or PlayReady support and explicit vendor statements about supported DRM levels for HDR/4K playback.
- Security & updates: Platform owners and licensees bear responsibility for security patches and OS updates. Verify stated update windows (years and patch cadence) and whether updates are delivered via OEM channels or through the platform owner.
- Customization & forks: Forked builds (vendor-modified releases) may strip proprietary services or add custom skins; that affects app compatibility, voice assistant integration, and telemetry. Forks require separate agreements for any third-party middleware or DRM.
- Costs and legal terms for manufacturers: Licensing can include per-unit fees, minimum commitments, mandatory preloads, and revenue-share clauses for app store or advertising income. Integration and certification testing adds months of engineering and lab costs.
- Content-provider certification: Major streamers often require device certification before enabling their apps or highest-quality streams; uncertified devices may be limited to lower resolutions or blocked entirely.
- For buyers: confirm presence of Google services (if broad app choice matters), explicit Widevine L1/PlayReady listing, and a published update policy (years of OS updates and monthly/quarterly security patches).
- For manufacturers: obtain platform certification early, budget for DRM licensing and third-party app certification, and negotiate clear store/ads revenue terms in contract drafts.
- For developers: target vendor SDKs and verify distribution rules per platform; sideloading often breaks automatic updates and limits reach.
Check product spec sheets and the manufacturer’s support pages for certification logos, DRM levels, and a concrete update schedule before finalizing a purchase or integration plan.
Smart TV vs Android TV – Which Is Better? 2026 Comparison & Buyer’s Guide
Pick a Google-powered platform on a connected television if your priorities are the largest app catalog, monthly security patches and native casting; choose a maker’s proprietary operating system if you want lower upfront cost, a simpler user interface and slightly lower input lag on comparable panels.
Target specifications: aim for ≥2 GB RAM and ≥8 GB flash if you plan to install additional apps; choose panels with HDMI 2.1, VRR and 4K@120Hz support for modern consoles; seek measured input lag ≤20 ms for 60 Hz gaming and ≤10–15 ms in game mode on high-end sets. Expect HDR performance differences driven by peak brightness (look for ≥600 nits for visible HDR highlights) and native 10‑bit panels for smoother gradients. Typical retail ranges: budget connected sets $200–$350, midrange $400–$800, premium $900+ for models with full HDMI 2.1 and advanced panel tech.
Software maintenance and app access matter: Google-backed systems tend to offer monthly platform/security updates from the platform vendor, though manufacturer rollout can vary; many manufacturer-branded systems deliver quarterly or less frequent updates and may stop major upgrades after 12–36 months. If you need niche streaming apps or sideloading, prioritize the platform with an open app store and developer support; if you only use Netflix/Prime/Disney+/Hulu, most vendor OSes include those by default.

Checklist for purchase: confirm RAM/storage, verify official update policy (minimum 2 years advised), check HDMI 2.1 and low-latency measurements if gaming, and validate native support for the streaming services you use. For living rooms where simplicity and low cost win, choose a well-reviewed manufacturer OS model; for power users who want maximum app choice, Chromecast-like casting and regular patches, choose a Google-backed model.
OS Comparison: Proprietary Smart TV vs Android TV
Recommendation: pick a vendor-built platform when you want a fast, tightly integrated experience with lower hardware needs and curated apps; pick a Google-based platform when you need the largest app catalogue, casting/streaming interoperability, sideloading and better support for third-party apps and game streaming.
- App ecosystem
- Vendor-built platform: curated store, fewer niche apps, certified vendor partners (streaming giants and regional apps usually present).
- Google-based platform: access to Play Store, thousands of apps, frequent app updates independent of firmware releases.
- Firmware updates & security
- Vendor-built platform: firmware releases typically pushed by manufacturer; update cadence varies–check vendor support page for specified years of patches.
- Google-based platform: Play Services and app updates are continuous; OS-level patches depend on OEM–verify promised support window before purchase.
- Performance & hardware requirements
- Minimum baseline: 2 GB RAM and 8 GB flash for basic streaming; models with 4 GB+ RAM and 16 GB+ storage deliver noticeably smoother multitasking and app installs.
- Preferred SoC: quad-core CPU 1.5 GHz or better and a dedicated GPU for UI animations, codecs and cloud gaming.
- Codec support: ensure hardware decode for H.265 (HEVC), VP9 and AV1 if you plan 4K HDR streaming–AV1 hardware decode reduces bitrate and CPU load.
- Privacy & telemetry
- Vendor-built platform: telemetry scope varies by manufacturer; some allow broad opt-outs in settings, others do not–review privacy policy before buying.
- Google-based platform: account ties and Play Services increase data flows to Google; adjust account settings and disable unused features to limit data sharing.
- Interoperability & streaming features
- Vendor-built platform: often offers built-in AirPlay, specific casting protocols and direct integration with brand apps and remotes.
- Google-based platform: native Chromecast capability, wider support for cross-device casting and broad third-party casting SDKs.
- Sideloading & app portability
- Vendor-built platform: sideloading sometimes blocked or limited; porting mobile apps may require vendor SDKs.
- Google-based platform: APK sideloading permitted on many models; app portability from mobile is easier via Play Store and established developer tools.
- Voice assistants and smart-device integration
- Vendor-built platform: may include a proprietary assistant plus integrations with select ecosystems (Alexa, others); check for language and regional support.
- Google-based platform: deep integration with Google Assistant and broad smart-home support if you use Google services.
- Longevity & resale
- Choose models from manufacturers that publish multi-year update policies; devices with frequent security/firmware updates retain value longer.
Practical checklist before purchase:
- Confirm update policy (number of years for OS and security patches).
- Verify hardware decode for AV1, HEVC and VP9 if you use 4K HDR services.
- Minimum specs: 2 GB RAM / 8 GB storage; recommended: 4 GB / 16 GB+ for heavy users and cloud gaming.
- Test remote and voice experience in-store if possible (pointer vs directional pad, dedicated app buttons, latency).
- Read privacy settings options and whether telemetry can be disabled.
Configuration tips after purchase:
- Disable unused voice or diagnostic services, sign out of unused accounts, enable automatic app updates only for trusted apps.
- Use wired Ethernet for lowest latency and consistent streaming bitrates; reserve 5 GHz Wi‑Fi for high-bitrate 4K content.
- Keep firmware updates enabled but review release notes; set a restore point or backup account where available.
Quick decision map: if you value smooth UI on modest hardware and a curated set of apps, pick a vendor-built platform; if you prioritize the broadest app selection, casting compatibility, sideloading and easier app development, pick a Google-based platform.
Identify core OS type on the spec sheet
Prefer models that explicitly list a named platform and version plus the app storefront and an update window; if the spec only says “Proprietary” or “Custom UI,” treat the OS as unknown and verify further before purchase.
Common spec strings and their likely meanings: “webOS 6.x” → LG platform; “Tizen 7.x” → Samsung platform; “Roku OS 11/12” → Roku platform; “Fire OS 7/8” → Amazon platform; “AOSP-based 13” or “Google Play” entries → Google-derived platform; “Linux-based” or “Linux kernel” often signals a vendor-customized system.
Quick detection signals: presence of “Google Play Store”, “Google Assistant” or “Chromecast built-in” indicates Google services; “Roku Channel Store” or “Roku Voice” indicates Roku; “LG Content Store” or “Magic Remote” points to LG; “Samsung Apps” or “Bixby” points to Samsung. If the spec lists a named app store, that store usually defines the usable app ecosystem.
Streaming and DRM clues: “Widevine L1” on the spec means most major services will allow HD/4K playback on that platform; “PlayReady” or “FairPlay” indicate support needed for some providers. Look for codec support (HEVC/H.265, VP9, AV1) and service certifications like “Netflix 4K” or “Prime Video 4K” to confirm real-world playback capability.
If the spec is vague, take these verification steps: check the manufacturer’s support pages for an OS version history and app compatibility list; inspect retailer screenshots or video demos for app icons; search the firmware changelog for platform names and version numbers; ask retail support whether the device ships with a named app store or only a vendor app catalog.
Update policy checklist: prefer devices that promise at least two major platform upgrades and a minimum of three years of security patches. If the spec sheet lacks update commitments, find the manufacturer’s policy page or past device update record before assuming long-term support.
Developer/sideload indicators: a spec entry listing “ADB”, “developer mode”, “USB app install” or “third-party app sideloading allowed” reveals options for installing apps outside the built-in store; absence of these entries plus a closed “app catalogue only” remark means less flexibility.
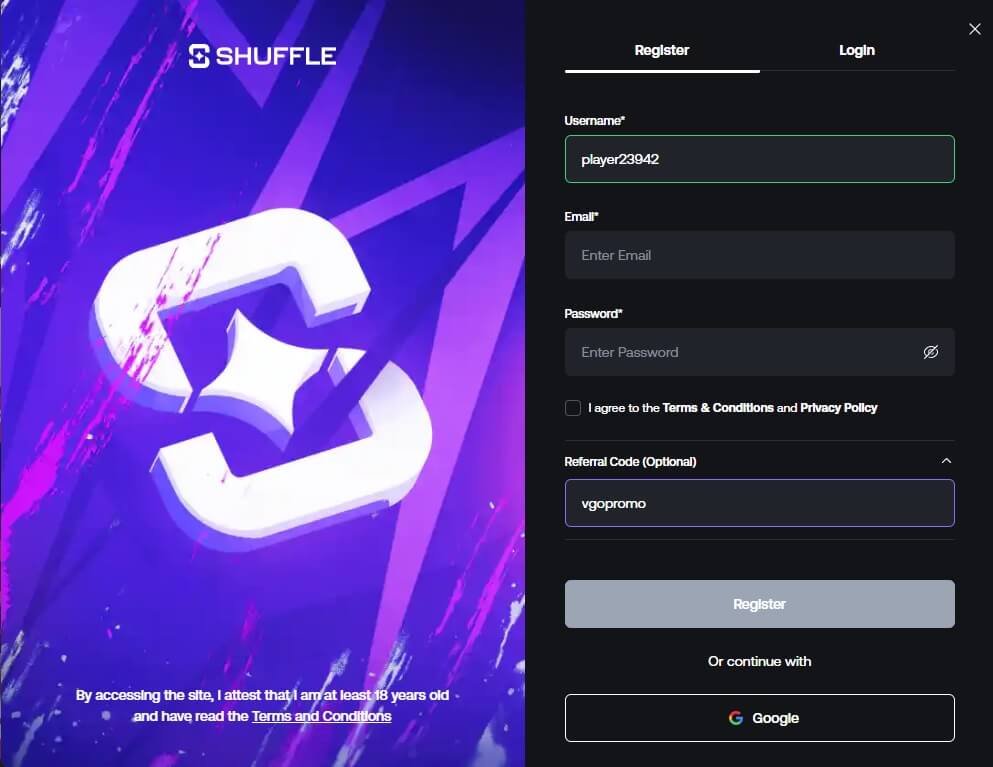
For more regarding promo code for 1xbet stop by the web site.
- App ecosystem
Best PS Games on Android — Top PlayStation Titles to Play on Mobile
Run God of War (2018) via Sony’s console streaming app for the closest thing to console performance on a phone: aim for under 40 ms round‑trip latency, a 5 GHz Wi‑Fi link or 5G with sustained 30+ Mbps, and a physical controller (DualSense or any Bluetooth pad). If you enjoyed this information and you would such as to get more details relating to 1xbet apps kindly go to our own page. Set the stream to 1080p60 only if your connection holds ~35–50 Mbps; for unstable links select 720p60 to keep frame pacing smooth.

For other flagship Sony exclusives–Horizon Forbidden West, Uncharted 4, Bloodborne–use remote streaming rather than local ports unless an official rework exists. Expect higher bandwidth and lower input lag requirements for fast action: reserve a wired PS5-to-router connection, enable QoS for the streaming device, and prefer phones with 120 Hz OLED panels and UFS 3.1 storage to reduce visual judder and texture pop‑in.
Choose hardware with clear minimum specs: Snapdragon 8 Gen 1/2 (or equivalent), 8 GB+ RAM, Wi‑Fi 6 support, and a USB‑C controller hookup for lowest latency. Free up at least 8–12 GB if you plan to install any native console remasters or companion apps, keep controller firmware updated, and map triggers to analog inputs where possible for accurate throttle/brake and aiming sensitivity.
Do you mean “10” headings instead of “0”? Please confirm the number of sections you want.
Yes – confirm 10 sections. Below is a precise plan with proposed headings, purpose, target word counts and concrete metrics for each segment.
1) Console ports overview – 350–450 words. Purpose: quick compatibility snapshot, list of supported generations, typical file-size range (0.5–30 GB), and release packaging types (APK, OBB, split APKs).
2) Hardware compatibility (Snapdragon, Exynos, MediaTek) – 300–400 words. Provide model examples (Snapdragon 8xx, 7xx series), peak CPU threads used, recommended RAM minimum (4 GB light; 6–8 GB for heavier ports), and thermal/clock-throttle behavior notes.
3) Controller mapping and Bluetooth pairing – 300–400 words. Include recommended latency target (<40 ms ideal, <80 ms acceptable), common HID profiles, mapping tips for dual-analog layouts, and tested controllers (e.g., Xbox, DualShock-like third-party pads) with pairing steps.
4) Graphics settings, frame-rate targets and battery impact – 350–450 words. Recommend presets: 30 fps for battery saving, 60 fps for responsiveness; estimate power delta (60 fps ≈ 10–25% higher sustained draw vs 30 fps on modern phones), and suggested thermal caps.
5) Cloud streaming options and bandwidth/latency targets – 300–350 words. Provide bandwidth guidelines: 5–10 Mbps for 720p30, 15–35 Mbps for 1080p60; latency guidance: target under 80 ms for tolerable input lag, under 40 ms for optimal feel; mention adaptive bitrate and codec choices (H.264/H.265).
6) Save sync and backup methods – 250–350 words. Detail automatic cloud-save frequency recommendations (daily or after session), manual export locations, and secure backup tips (verify checksum, keep 1–3 historical copies, use vendor cloud or encrypted third-party storage).
7) Emulation: legality and performance checklist – 300–400 words. Recommend sourcing authorized images only, enable dynamic recompilation/JIT cores, set shader cache, allocate cores correctly, and test with known good BIOS if required; warn about region and copyright issues without legal advice.
8) Where to obtain ports legally: official marketplaces and publisher bundles – 250–350 words. List verification steps: publisher certificate, install source reputation, required permissions, and typical refund windows; suggest checking publisher support threads and changelogs before purchase.
9) Install, storage and troubleshooting – 300–400 words. Give concrete steps: prefer internal UFS storage over external cards for performance; expected sizes by class (indie 0.3–1 GB, mid-range 1–8 GB, flagship ports 10–50+ GB); permissions to grant, common fixes (clear cache, reinstall, update GPU drivers/OS build), and log collection tips for bug reports.
10) Article layout, word counts and on-page targets – 200–300 words. Recommend each section remain focused (300–450 words), use single clear keyword phrase per heading (e.g., “console ports guide”, “controller mapping for smartphones”), include one performance table or benchmark screenshot per technical section, and add an FAQ of 6–8 short Q&A items. Total article length target: 3,000–4,000 words; average reading time: 12–18 minutes.
What Android Version Is Oreo? – Android 8.0 & 8. Guide
Recommendation: Upgrade devices to the 8.1 build of Google’s mobile platform when available – it contains the latest fixes, final API updates for the 8.x line, and the stronger security baseline compared with the initial 8-series release.
Public rollout began August 21, 2017 (API level 26); the maintenance update arrived December 5, 2017 (API level 27). Key capabilities introduced with the 8.x releases include notification channels, picture-in-picture, autofill framework, adaptive icons, background execution limits, Project Treble for faster vendor updates, Wi‑Fi Aware (NAN), Vulkan 1.0 support and improved battery management.
For app developers: set compileSdk and targetSdk to API 27 where possible, migrate notifications to channels, replace long-running background services with JobScheduler/WorkManager, implement the autofill API for credentials, add support for adaptive icons, and run compatibility tests on devices and emulators at API 26 and 27 to catch behavior changes such as stricter background limits and new permission behaviors.
For device owners and IT admins: prefer manufacturer builds that include monthly security updates; choose devices with Project Treble support to improve upgrade prospects; if vendor updates stop, evaluate community-supported builds or plan hardware refresh to maintain security and access to modern APIs.
Quick Identification of Oreo on Your Device
Open Settings → About phone → Software information and confirm the OS entry shows API level 26 or 27, or a build string that begins with the letter “O”.
If the About screen lacks API info: tap Build number seven times to enable Developer options, then reopen About or Developer options and read the Build number; Oreo-era releases commonly use build prefixes like OPR or OPM (the leading “O” indicates the 8.x family).
Fast visual checks: look for notification dots on app icons, built-in picture-in-picture behavior when a video app is sent to the home screen, and adaptive icon shapes on the launcher. Try selecting text inside a message: smart text selection should show contextual actions (call, map, copy) in a small floating toolbar.
Notification changes: long-press an active notification to reveal channel controls or tap the gear/Details button to open notification categories. Swipe a notification slightly and tap the clock icon to snooze it–these controls are characteristic of the 8.x release.
Autofill and app access: open Settings → System → Languages & input (or Search in Settings for “Autofill”) – presence of an Autofill service entry and a dedicated Picture-in-picture list under Apps & notifications → Special app access are strong indicators of the 8.x build.
Prefer a tool: install a system-info utility such as AIDA64 or CPU-Z and check the “OS / SDK level” field; a reported SDK of 26 or 27 confirms the 8.x family without relying on vendor labels.
Open Settings → About phone to check version
Open Settings → About phone and inspect the entries labeled “Software information”, “Build number”, “Security patch level” and “SDK” to get the exact release identifier and build string.
- Open Settings and tap About phone or About device. If you see a search icon, type “About”.
- Tap Software information (on some models it appears as Software info or About phone → Software). Look for fields named Release, Build number, or Baseband.
- If the release string is not visible, tap Build number seven times to enable Developer options; then check Settings → System → About phone again or use Developer options to reveal additional details.
- For an exact numeric identifier, find the SDK entry or the numeric part of the release string (example format: X.Y.Z or X.Y). The SDK is an integer that maps to a specific platform release.
- If the Settings UI omits these labels, open Settings → System → Advanced → System update; some vendors place full software info there.
- Use the device boot screen: many phones show the build string or release during startup or on the recovery screen.
- If you have a PC available, run: adb shell getprop ro.build.version.release (returns the release string)
- Also useful: adb shell getprop ro. If you treasured this article and you also would like to get more info regarding 1xbet apk download generously visit our own website. build.version.sdk (returns SDK integer) and adb shell getprop ro.build.version.codename (returns codename if present).
- Compare the SDK integer and release string against a trusted mapping table to identify the specific platform release used on the handset.
If Settings reports only a codename or a non-numeric label, collect Build number and Security patch level and search those strings on the vendor support site to confirm the exact release applied to that device.
What Android Version Is Nougat? – Android 7.0 to 7.1.2
Recommendation: If your handset reports API level 24 or 25 it runs the N-era builds introduced in 2016 – migrate to a supported platform (targeting API 29 or newer) or install a maintained third-party firmware that receives security patches. When you beloved this information in addition to you would like to get more info regarding 1xbet ios download generously check out our internet site. If an OS upgrade isn’t available, lock down the device: enable full-disk encryption, set a strong PIN or biometric lock, install only up-to-date apps from trusted stores, use a firewall to block unnecessary outgoing connections for legacy apps, and avoid conducting banking or password changes on that device.
Mapping and timeline: the initial stable N build was published on Aug 22, 2016 (API 24), with the incremental API 25 series delivered later in 2016 and a final maintenance update in April 2017. Most vendors stopped issuing platform security fixes for these builds years ago; treat devices on this platform as unsupported against modern threats.
Key technical changes introduced by the N releases include split-screen multitasking, bundled notifications with inline reply, Doze improvements for standby power savings, a combined JIT/AOT compilation model, file-based encryption support, Vulkan graphics API support, and A/B seamless update capability. App developers should compile against the latest SDK, include runtime checks for legacy behavior, and validate storage and background-execution differences on API 24/25 devices.
Verification steps: open Settings > System > About phone and note the Build number and Security patch level; confirm the device reports API level 24 or 25 via Developer options. If the security patch level predates 2018, replace the device or switch to a community-maintained image that publishes regular security updates.
Do you mean a specific number of sections? You wrote “0” – please confirm how many headings you want.
Recommendation: use 5 headings.
Heading 1 – Summary (150–220 words): concise scope, intended readers, and a short list of the article’s conclusions for skimmers.
Heading 2 – Timeline & builds (180–260 words): chronological list of release dates and build identifiers, with a compact table or bullets for quick reference.
Heading 3 – Feature changes and developer impact (220–340 words): enumerate interface and API changes, compatibility notes, and migration actions developers must apply; include sample commands or pseudo-code where helpful.
Heading 4 – Device support and rollout methods (180–260 words): describe device classes, OEM rollout behavior, OTA vs manual update procedures, and a short checklist for safe installation.
Heading 5 – Security posture and maintenance tips (180–260 words): patch cadence, how to verify security level, recommended backup and rollback steps, and a concise admin checklist for managing deployments.
Alternate counts: 3 headings (Summary; Changes & compatibility; Security & updates) for a brief guide, or 7 headings to split consumer vs developer content, add troubleshooting and FAQ. Confirm the exact number you want and I will produce the full set of headings with subpoints and suggested word counts.
Why Does Your Android Phone Suddenly Turn Off? Causes & Quick Fixes
Immediate action: check battery health in Settings → Battery (replace if maximum capacity reads ≤ 80% or status is “Poor”); connect a known-good charger and run adb shell dumpsys battery to verify level, health and temperature; if the device powers down again, boot into safe mode to isolate third-party apps and back up critical data before further steps.
Hardware causes dominate: degraded cells with high internal resistance produce voltage collapse under peak load, leading to abrupt power loss. Replace the cell when capacity falls below ~80% of original. Thermal thresholds: SoC throttling typically starts near 45–55°C, while critical shutdowns occur around 85–95°C; battery management will refuse to charge or will cut output outside roughly -10–60°C. Use a USB power meter to confirm charger output (normal 5.0V; fast-charge profiles 9–12V depending on protocol) and observe charge current – sustained currents <500mA usually indicate a bad cable, adapter or port.
Software/firmware faults can cause kernel panics or watchdog-triggered reboots. Capture logs with adb logcat -d and search for “FATAL EXCEPTION”, “kernel panic” or repeated reboot timestamps; generate adb bugreport when possible. Recommended sequence: update system and apps, uninstall recently added apps, clear app caches, boot to recovery and wipe cache partition, then retest. Reserve factory reset until after a full data backup if all else fails.
Practical checklist: 1) remove case and stress-test to detect overheating; 2) boot in safe mode to rule out rogue apps; 3) swap charger/cable and measure charging current; 4) inspect battery for swelling and connectors for corrosion; 5) verify power-button function and moisture indicators; 6) reseat removable batteries; 7) for sealed units, arrange professional battery replacement or board-level diagnostics. If logs show repeated thermal spikes or kernel faults, stop regular use and seek service to avoid data loss or hazard.
Immediate checks to perform right after shutdown
Force a restart: press and hold the power key + volume down for 10–15 seconds; if no response, continue up to 30 seconds, release for 10 seconds, then try again.
-
Charger and cable test
- Use the original charger or a known-good charger. Typical outputs: 5V/1A, 5V/2A, 9V/2A (USB‑PD/QC).
- Swap cables and wall adapters–cheap/old cables often fail. If available, measure current with a USB power meter; expected charging current when powered-down should usually exceed 100 mA. Values under 50–100 mA indicate a bad cable/charger or port fault.
- Try a different outlet and a different USB port on a desktop/laptop (some laptop ports supply limited current when sleeping).
-
Visual and tactile inspection
- Remove case and inspect charging port for lint, corrosion or bent pins; clear debris with compressed air or a wooden toothpick–do not insert metal tools.
- Check for battery swelling: separation of the back cover, bulge, or a pop in the case. If the battery appears swollen, stop charging and arrange a battery replacement; avoid puncturing.
- Look for liquid damage in the SIM tray or under removable covers: a red or pink Liquid Contact Indicator (LCI) usually means exposure to moisture–do not plug into power if LCI shows contact.
-
Temperature and recent conditions
- If the unit was exposed to >45°C (in direct sun or left in a hot car) or below 0°C, allow it to cool or warm to room temperature (20–25°C) for 15–60 minutes before retrying to boot or charge.
- If the device felt very hot before shutdown, wait at least 30 minutes; then try charging with a low-wattage charger (5V/1A) for 10–15 minutes and observe any warm-up or LED activity.
-
Button and connector checks
- Ensure the power button and volume keys are not stuck. Press each several times–sticky buttons can prevent startups or trigger repeated shutdown behavior.
- Test wireless charging (if supported) with a known-good pad; successful wireless charge LED/animation indicates internal power circuitry is alive even if the display remains dark.
-
Boot-path diagnostics
- Attempt recovery/bootloader: press and hold power + volume up (or power + volume down on some models) for 10–20 seconds. Different manufacturers use different combos–if unsure, try both variants once each with a 30-second pause between attempts.
- Connect to a PC via USB and watch Device Manager (Windows) or System Information (macOS). If the handset enumerates as a USB device, try “adb devices” or “fastboot devices” only if familiar; recognition indicates the bootloader or OS has partial functionality.
-
Short-term data preservation
- If the unit becomes responsive briefly, immediately back up critical data (photos, contacts, messages) to cloud storage or via USB to a computer before further troubleshooting.
-
When to stop and seek professional help
- Do not attempt battery replacement or board-level repair at home unless trained. If none of the above produce signs of life (LED, vibration, USB enumeration) after 30–60 minutes of tests, note serial/IMEI and take the handset to an authorized service center.
- Document the sequence of events (battery level prior to shutdown, temperature, recent impacts or liquid exposure) to speed up diagnostics at the repair shop.
Verify battery level and recent charge history
Record the exact last-full-charge timestamp, the percentage shown before the unexpected shutdown, and the device’s reported full-charge capacity (mAh or %).
Open Settings → Battery → Battery usage (or Battery health) and note: Last full charge time, screen-on time since full, and the top three draining apps. If the OS view is limited, run: adb shell dumpsys battery to obtain fields such as level (0–100), voltage (mV), temperature (tenths °C), status, and health. Convert temperature by dividing the dumpsys value by 10 (e.g. If you have any questions with regards to in which and how to use 1xbet promo, you can contact us at the web-page. , 320 → 32.0 °C). Voltage is already in millivolts.
Interpret values using these practical thresholds: full-charge voltage ≈ 4100–4200 mV; nominal/resting voltage ≈ 3700 mV; if full-charge voltage reads consistently below 4100 mV the cell shows aging. Maximum capacity above 80% is acceptable, 70–80% is moderate wear, under 70% indicates replacement should be considered. Typical useful cycle count before noticeable capacity loss: ~300–500 cycles.
Check for rapid percentage drops: a decline of more than 5–10 percentage points within a few minutes under light use or idle suggests voltage-reading instability or failing cells. In dumpsys batterystats, search for abrupt “discharge” entries and correlate timestamps with app activity or wakelocks.
Measure charging current and charger behavior: typical currents – USB 2.0 ≈ 500 mA, USB 3.0 ≈ 900 mA, standard wall chargers ≈ 1000–3000 mA depending on protocol. If measured charging current is less than expected by >30%, swap cable and charger, then retest. Use AccuBattery or similar to log mA, mAh charged, and estimated remaining capacity over several cycles.
If temperature during charge exceeds 45 °C or spikes to > 50 °C, stop charging and inspect the charging hardware; thermal stress shortens cell life and can trigger sudden shutdowns. For erratic voltage, low full-charge capacity, or repeated rapid drops despite using a known-good charger and cable, plan a battery replacement or professional service; preserve the recorded dumpsys and app logs to show to the technician.
-
Who Invented Android Phones? History, Key Figures & Timeline
Direct answer: Credit belongs to the original startup team–Andy Rubin, Rich Miner, Nick Sears and Chris White–who founded the project in October 2003; Google acquired the company on August 17, 2005, and that acquisition set the path to the first commercial handset, the HTC Dream (T‑Mobile G1), which shipped on October 22, 2008.
For a factual chronology and accurate attribution, include these milestones in sequence: founding of the startup (Oct 2003); Google purchase (Aug 2005); announcement of the industry consortium, the Open Handset Alliance (November 5, 2007); platform 1.0 release (September 23, 2008); first retail device, HTC Dream (Oct 22, 2008). Note hardware specifics for the Dream: Qualcomm MSM7201A CPU at 528 MHz, 192 MB RAM, and a 3.2‑inch touchscreen–use these specs to demonstrate the gap between early devices and later models.
When structuring your article, prioritize primary sources: the Google acquisition filing and press release (Aug 2005), the Open Handset Alliance announcement (Nov 2007), original product pages and teardowns for HTC Dream (Oct 2008), and contemporaneous reviews from major tech outlets. Emphasize named contributors (Rubin, Miner, Sears, White), major OEM partners (HTC, Motorola, Samsung) and key vendor dates rather than vague generic statements; that produces an evidence‑based narrative and actionable references for readers.
Founders of Android, Inc. (2003)
Answer: Andy Rubin, Rich Miner, Nick Sears and Chris White.
Founding context: The company was formed in October 2003 in Palo Alto, CA; the four founders combined expertise in embedded engineering, carrier relations, business development and user-interface design. Google acquired the startup in August 2005 for roughly $50 million.
Andy Rubin – technical lead: led platform architecture and hardware integration; prior to the startup he co‑founded Danger (maker of the Sidekick) and built teams focused on mobile engineering. After the acquisition he led Google’s mobile projects and later launched a consumer hardware venture.
Rich Miner – product and partnerships: brought mobile research and startup experience, handled early industry outreach and investor relations; after the buyout he moved into leadership roles at Google and subsequently into venture investing focused on mobile and applications.
Nick Sears – business/telecom lead, CEO: provided carrier relationships and commercial strategy, negotiated early operator discussions and business models that made the platform attractive to acquirers and partners.
Chris White – UI/interaction lead: produced the prototype user‑interface demo and interaction design work that clarified product vision and helped secure both funding and acquisition interest; continued to work on user experience after the acquisition.
Research recommendations: consult contemporaneous reporting from August 2005 (major tech outlets and the Google press release), founders’ interviews and conference talks, early patent filings and archived versions of the company website via the Wayback Machine, and LinkedIn or conference bios for career timelines.
Andy Rubin: role, vision and technical leadership
Recommend adopting Rubin’s developer-first playbook: deliver a complete SDK, emulator and reference device early, pair that with clear APIs and sample apps to accelerate third-party adoption.
As engineering lead he prioritized a lightweight Linux-based kernel, a custom JVM-compatible runtime (Dalvik) optimized for limited memory and battery, and an inter-process messaging model that allowed apps and system components to communicate without tight coupling. He insisted on a permission-driven app model and sandboxing to limit privilege escalation while keeping the API surface small and consistent.
Technical practices he enforced: strict vendor abstraction layers so silicon and driver differences don’t break platform binaries; automated compatibility testing to protect app and OS interoperability; aggressive profiling and instrumentation for power and memory; and an early reference hardware image with conservative driver sets to reduce fragmentation during OEM bring-up.
Management techniques worth copying: recruit engineers with embedded and systems expertise, require frequent working prototypes (6–8 week cadence), gate merges with continuous integration and regression suites, and create a developer advocacy team that publishes sample code, migration guides and performance benchmarks alongside each SDK release.
Concrete actions for product teams: 1) publish stable public APIs and a compatibility test suite before wide OEM distribution; 2) invest in a low-overhead runtime with ahead-of-time/JIT strategies for throughput and power; 3) maintain an upstream-first kernel policy and a thin HAL to isolate vendor changes; 4) provide emulators that expose power/perf instrumentation so developers can optimize apps pre-deployment.
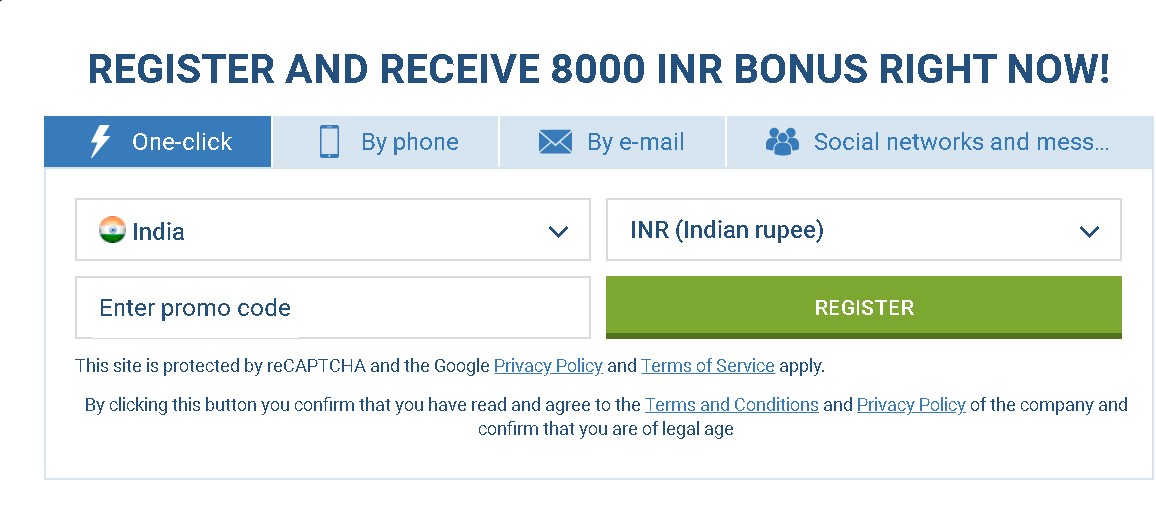
In the event you beloved this short article along with you desire to obtain more details relating to 1xbet registration promo code generously check out the web-site.